Toolbox How to Use, When to Use?
1. The Toolbox, what’s in it?
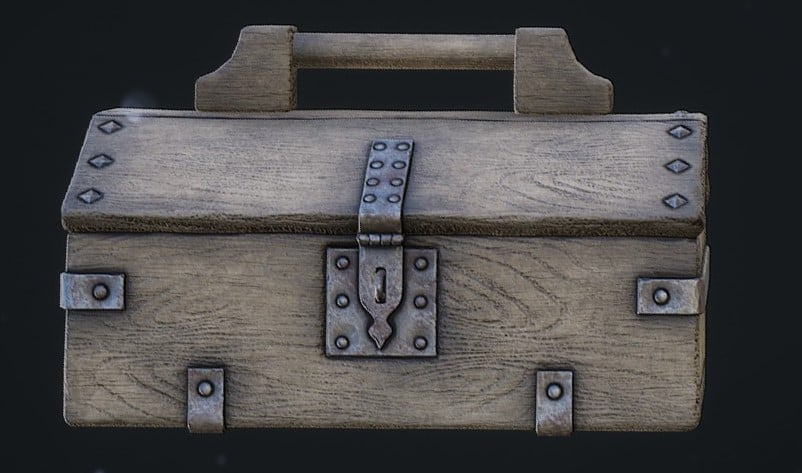
The toolbox costs 8 gear score to equip on your loadout. It can be used to build structures and mounted crossbows. Using the toolbox requires supply (kind of ammunition for the toolbox). Regardless of the game mode there is a limit of 6 structures and 1 mounted crossbow per player. If you build more when you have already hit the limits, the old ones will be automatically destroyed in the order they were placed.
There is a separate balancing in the game for the Horde mode. All the other game modes share the same balancing, therefore all the numbers discussed are considering the ‘normal’ values and the horde mode differences are presented in a separate section.
The toolbox contains initially 3 supplies when you spawn with it. You can gain 3 supplies by visiting a resupply box (ammo box) and there is a moderate delay before you can resupply. You can carry a maximum of 6 supplies. If you resupply with 4 or 5 supplies, you are wasting your refills!
2. What can you build and how to do it?
All you need for building the two structures and the weapon is the toolbox. However, you can speed up the build up of the structures but not the weapon with specific tools, more on that later.
Once you have the toolbox equipped and you have the necessary amount of supply, you can build with left mouse button and change the object by pressing R. Once placed, there will be an assembly sound and the object will automatically build up. Do note that the mounted crossbow option only shows up with 6 or more supplies!
The wooden spikes
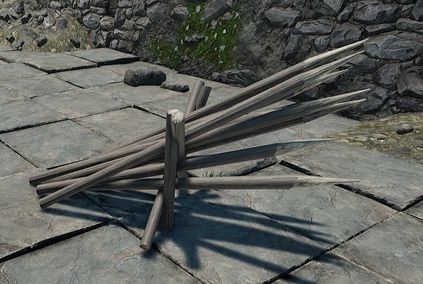
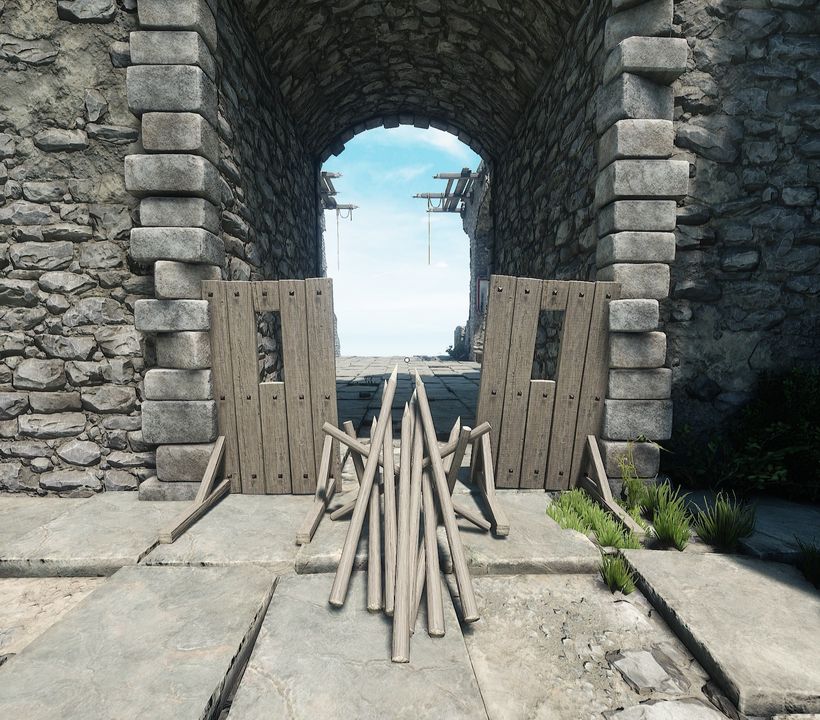
The wooden spikes have 125 health, cost 1 supply and it takes 20 seconds for the automatic build. The build progress is indicated by sawing noises that rise in pitch as the build becomes ready. The spikes deal damage based on the velocity of the player when moving towards the spikes. On a flat terrain, there is no way to jump over the spikes from the pointy end but with some elevation in the terrain it can become possible. The damage is dealt both to team mates and enemies. The spikes will get damaged by friendly and enemy attacks.
The spikes are exceptionally good for keeping horses away and creating traps.
The wooden walls
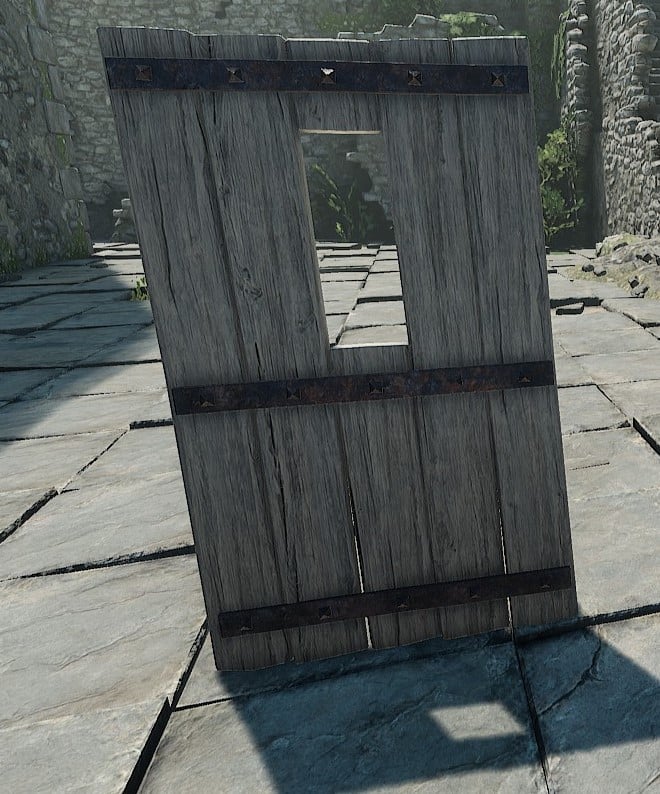
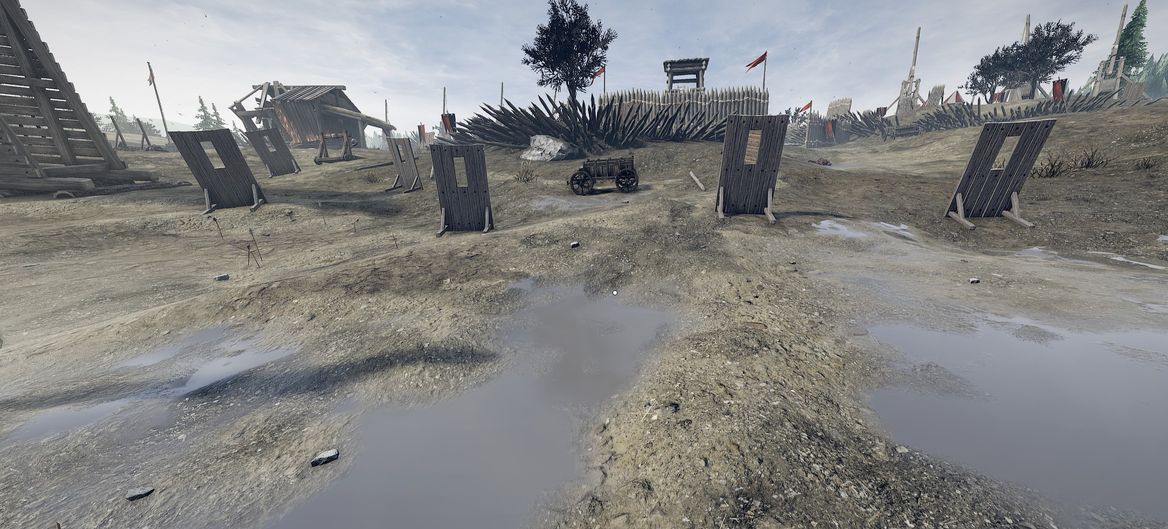
The wooden walls have 250 health, cost 1 supply and it takes 20 seconds for the automatic build. The build progress is indicated by sawing noises that rise in pitch as the build becomes ready. You can provide cover with it for your archers or block doorways and narrow corridors with them. One can also relatively easily stab with a spear or sword through the hole but it does require some practice and an enemy to stand quite near on the other side.
The walls are exceptionally good for blocking pathways and providing cover.
The mounted crossbow
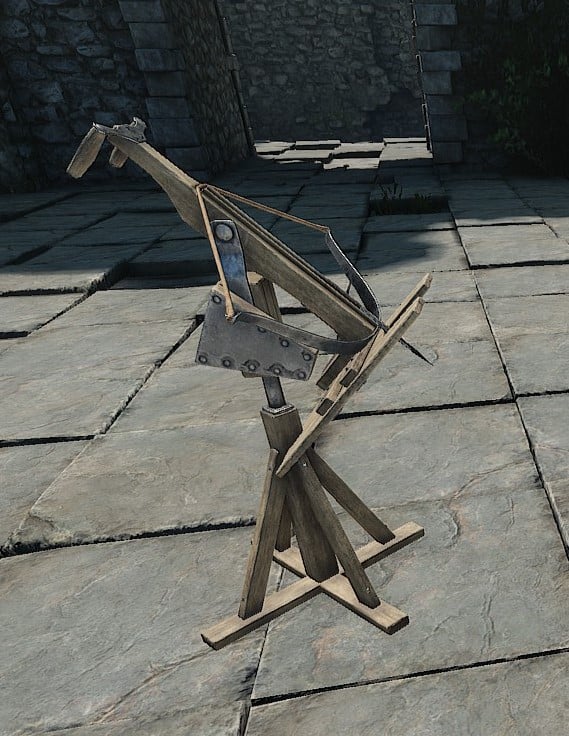
The only weapon that you can build is the mounted crossbow. The mounted crossbow has 50 health, costs 6 supplies and takes 10 seconds to build. The build up process is indicated by 2 laud assembly sounds after the initial one, with the last one having more pause before it comes and indicating that the weapon is ready. It has a 5 ammunition clip that is initially full and recharges at 1 ammunition per 5 seconds as long as the clip is not full.
Because I do not have friends who play this game, I have been unable to properly test the damage, but it seems to do from 25 to 75 damage depending on the enemy armour and if you hit the head or not. The fire rate is quite fast but the arrows fly slowly and the turning angle is very limited.
Anyone can shoot the mounted crossbow but due to the limited turning angle, it cannot really be used against you. B ecause of the small health, it is often destroyed in a few swings once the position is overrun by the enemy.
The mounted crossbow is exceptionally good for shooting narrow choke points from short to mid range.
3. Repairing and speeding up the build
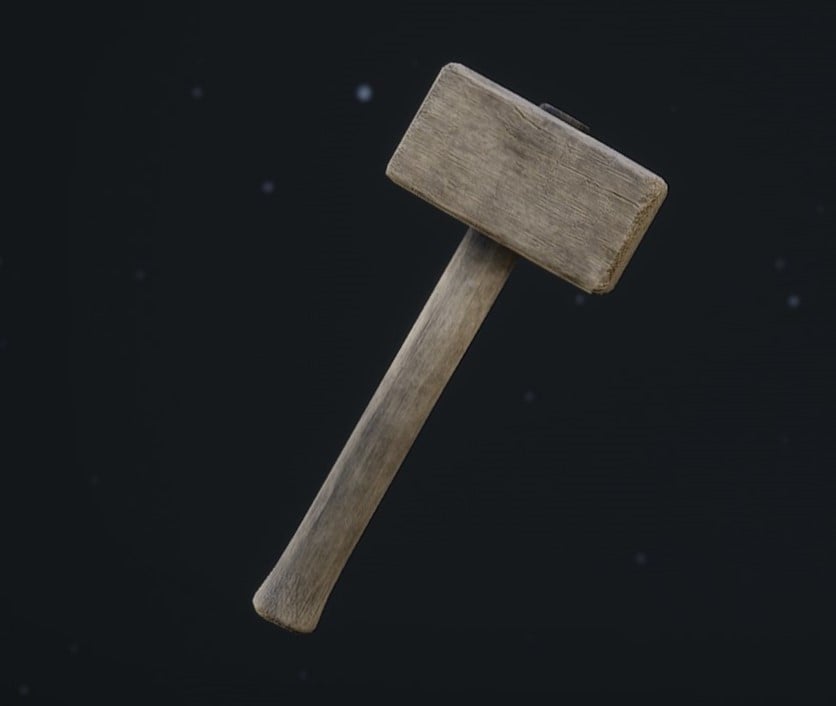
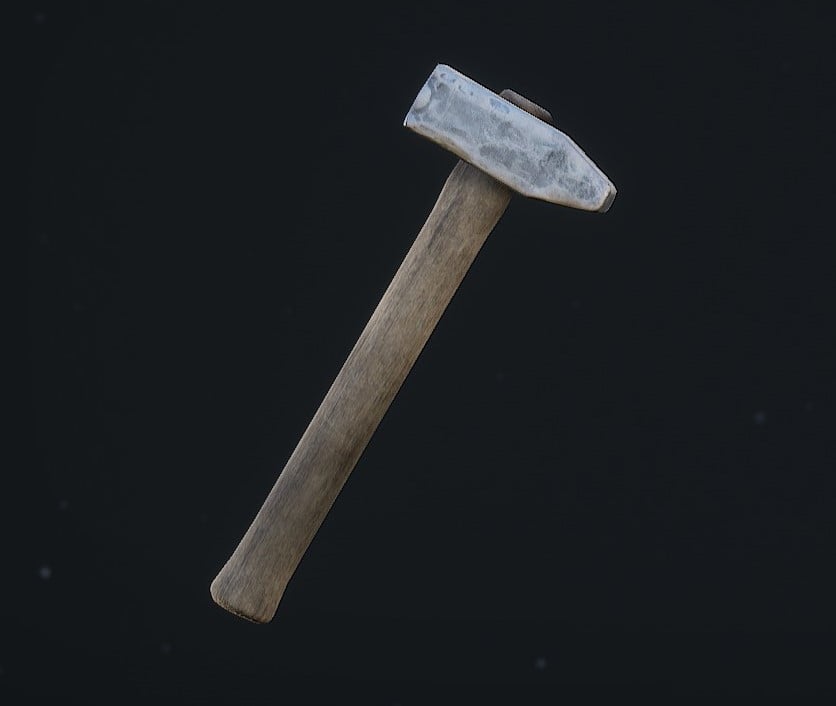
There are two tools in the game that allow you to repair all your structures and the mounted crossbow as well as to repair fortifications in the Frontline game mode: The wooden mallet and the blacksmith hammer. In addition, there is the smith perk for 1 gear socre, which increases the repair and building speed of your tool by +50%.
In order to speed up the build, you need to hit the actual object, which can sometimes be a bit tricky. Crouched overheads and uppercuts are your friend here. The smaller the health of the structure is, the faster you can build it up with the tools, with the exception of the mounted crossbow which cannot be sped up. Speeding up the build is essentially the same as repairing the object.
There are four levels of repair (and build up) speed that you can obtain and these scale directly with the gear score costs. The more you spend, the more you get.
Gear score requirement directly equals the level of the repair speed:
- 1 gear score – Wooden mallet
- 2 gear score – Wooden mallet + Smith
- 3 gear score – Blacksmith hammer
- 4 gear score – Blacksmith hammer + Smith
If you want to do repairs while there are enemies nearby, I do not recommend aiming for anything less than the level 3. You can kind of manage with the level 2 but level 1 is just a waste of gear score.
There is quite a gap from level 2 to level 3 and 4, spending the extra amount is very noticeable specially when building the spikes as the build can be finished in two hits with level 4.
Damaged and destroyed buildings
The walls get wholes as they are being damaged and spikes break down, they essentially go through the stages of building up in reverse when they break down with the exception of the mounted crossbow, which becomes more dirty and scratched looking when it is damaged.
The most effective tools against the buildings are axes and the wrecker perk as well as fire pots. If you have a level 4 repair speed, you can keep up quite well with an axe but a fire pot will quickly destroy all the objects that can be built.
When an object is destroyed beyond repair, it will be deleted from the game. The only exception is the mounted crossbow which splits into two parts for a while before disappearing.
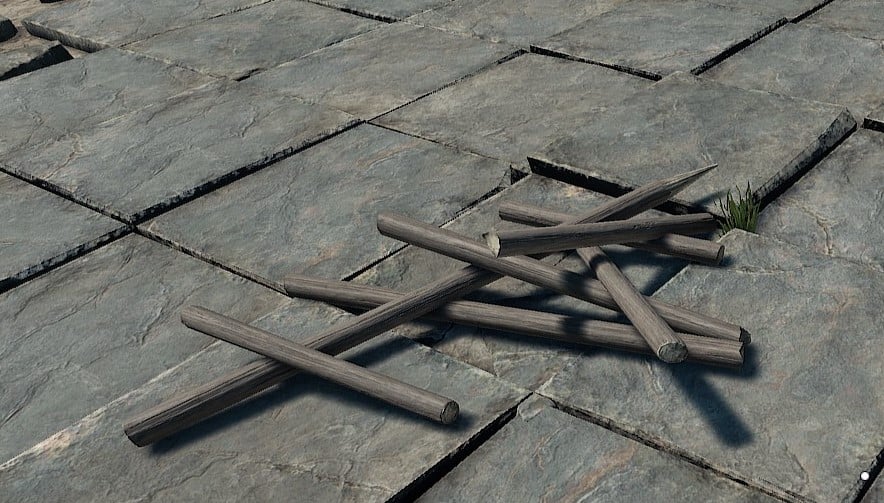
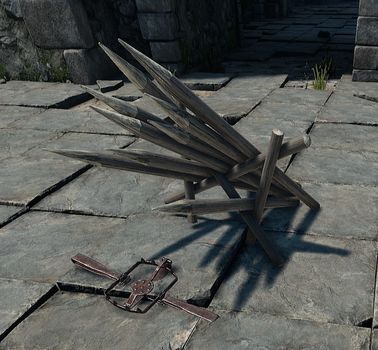
That being said, there seems to be a miss understanding with the spikes for quite many. Very often you can see the spike sticks on the ground like in the figure on the right. However, the spikes are only disabled and one hit away from being destroyed. If you see spikes like this, you can still repair them, but remember, you must achieve a direct hit so a crouch overhead is your friend on flat terrain.
Interestingly though, the damage of the spikes is not affected by their condition with the exception of the last stage where they are completely disabled. The wall obviously gets more holes that arrows, spears and sword thrusts can slip trough.
4. What to expect when playing with the toolbox
The toolbox is a very expensive piece of gear. Your combat capabilities will therefore be very limited. Throughout my testing, I also encountered a lot of players from my own team that were intentionally destroying my buildings or killing me. There are also some who like to kick you out of the mounted crossbow so that they can use it instead, which is very of dumb of their end as they are usually more equipped for combat and can achieve more by heading out to the front.
The toolbox is very hard to use effectively, in fact, I think there are a few buffs that should be applied to it in my opinion, but we have what we have and I will tell more on that in the comment section. Luckily, there are those awesome moments with correct placement that do get you to giggle so at least it is very fun at times.
The toolbox is also a great tool for trolling, which in turn makes the life of those who actually want to use it even miserable as the general attitude towards buildings is very negative. Expect your buildings to be destroyed by your enemies and your team mates.
Dealing with the hostility from your team mates
When you are getting team killed or an ally is destroying your buildings, there are few things to consider. First, make sure that you did not build a trap for your team mates or that you did not completely block an important route from spawn area to the next target . If you are sure that you did not commit on any of those, then you did nothing wrong. Everyone is responsible for using their eyes but if you build a block that has a tricky way to get through, like climbing or jumping from a certain spot, be sure to demonstrate every now and then how to get through for you team mates.
If you did something wrong, the misbehaviour of your team mates is caused by a proper reason. Replace your buildings in a way that it is not completely harmful for your team mates. If you did not do anything wrong, then it is just best to ignore them, repair and rebuild all your buildings.
People play this game with the attitude of ‘HULK SMASH’. Therefore, they get quite easily bored to the sound of clapping wood and bashing their team mates without any effect on your game play. Trust me, they will go back to smashing some enemy heads in no time. Do not try to fight back with your hammer as you rarely have a chance and they get bored faster if you do not give a damn about them. Furthermore, if you look totally helpless, quite many are willing to ‘lend you their sword’.
Keep calm, and continue building.
5. Tactical decision making
I have used the toolbox in pretty much every game mode. It should be rather obvious that playing with a toolbox in Deathmatch, Team Deathmatch or Skirmish should be done only for the memes, be sure to pick up the lute or frying pan to complement your style. Orange hair colour, huge nose and a floppy voice with the highest pitch are your only chance of successfully pulling it off. Although, you can create some nice arenas on 1v1 Deathmatch servers, for example, a bridge section enclosed with spikes so that if a player backpedals too much they risk getting instantly killed.
That being said, the more serious environments for using the toolbox are the Frontline and the Horde. The toolbox is very powerful in the Horde if used correctly. Therefore, the guide lines provided under this section were created with Frontline in mind, as there is an own separate section for the Horde mode.
Recognise what you are trying to achieve
The supply you have is very limited. With a full load of supply you can either create a single mounted crossbow or 6 structures. If you need to leave your buildings to get more supply from further away, there is a high chance that the battle has already moved elsewhere or that your buildings were destroyed by any player.
These are the major goals on the battle you can achieve with supply costs that are usually needed for each plan:
- Fully block a choke point (1-3 supplies)
- Partially block a choke point (1-3 supplies)
- Create a trap (1-3 supplies)
- Provide protection from horses (3-6 supplies)
- Provide cover on an open area (3-6 supplies)
- Add pressure to a choke point (6 supplies)
If the resupply box is nearby and the battle drags out you may be able to complete even a couple of these goals.
If you are having trouble in deciding what to do or have moments of very ineffective gameplay, take a look at this list and refer to the next sections for inspiration.
6. Blocking choke points
There are three ways to block a choke, fully blocking, one-way blocking and two-way blocking. Your main structure for this should be the wooden wall due to the high health pool except with the two-way block where you should use mainly spikes. The amount of spikes you use and how dense you make your buildings determine how fully or partially the choke will be blocked.
There are always multiple ways around so do not expect your defence to be blood tight. Ideally you should partially block a side flank with a one-way block and partially block the main entrance with a two-way block.
Fully blocking a choke point
You should only consider fully blocking a choke point as means of waiting for reinforcements and stalling the enemy. It is an active defence tactic and should be used only in a pinch. Do not just fully block something and leave it there, be kind and take it out before you leave… if you can.
A full block can be made on a narrow passage or a doorway and consists of only wooden walls side to side until the narrow passage is closed. A doorway takes one wall but bigger entrances take three. Do note that if there are any friendlies falling back you will sentence them to death if you close the escape route before them.
Partially blocking: one-way block
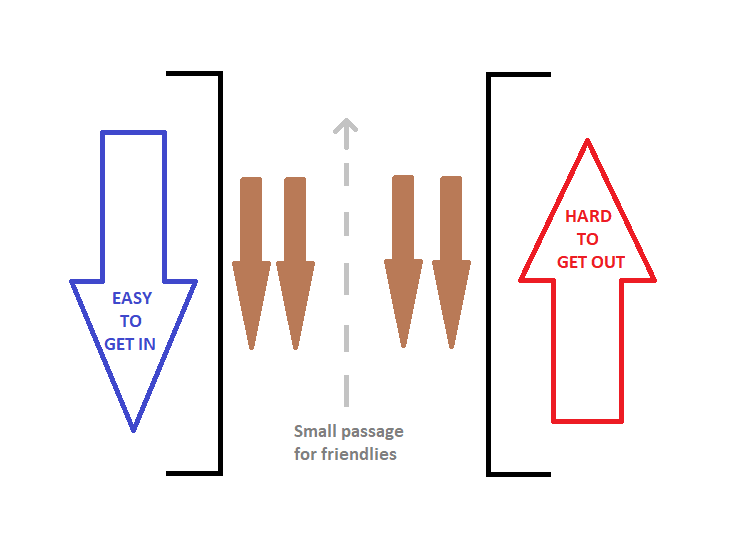
The one-way block consists of a single set of spikes and usually zero to two wooden walls. The main purpose of the one-way block is to allow fast movement to one direction and block the movement completely into the other direction.
The best place for a one-way block is on a side flank where not that many enemies are encountered as there is a risk of death trapping your friendlies if there becomes a lot of resistance on the other side.
Partially blocking: two-way block
The two-way block is the best one to place on a main entrance or when you are unsure if you should completely block something or not. It is also the only one of the blocks that may not be destroyed with a single fire pot.
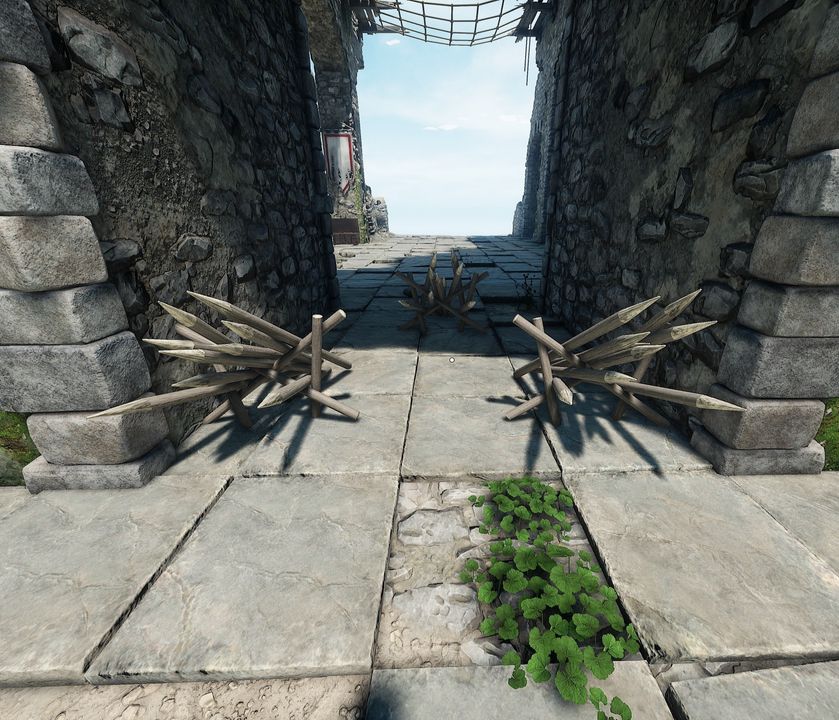
The two-way block is just basically laying out spikes on a narrow passage so that it is completely safe to run to one direction but care must be taken when traversing to the other direction. You should try to place the spikes around corners as people ten to hug the walls. You can also use walls to narrow a passage down before you lay out spikes.
The common misconception is the direction of the spikes. The spikes should actually be facing the direction you are coming from. In Frontline, it should become quite clear that the battle is a constant back and forth movement. One team pushes forward, then the other one pushes and so on.
The idea with the two-way block is to allow the enemy to easily push in but make it extremely hard for them to backpedal and run out, essentially creating a trap and allowing your team to score a lot more kills when you start to push back in. If you manage to land a blow or kick an opponent that is standing in front of the spikes, it will be an instant kill.
If you place the spikes to face your opponents, they will never run to them as they can see the spikes from far away. However, you will kill your own team mates when they try to backpedal to safety after a push, or even worse, start sprinting in panic into the spikes.
Do not limit your self only these text book like placement patterns, you should mix the spacing up but do keep in mind the general purpose of the blocks. For example, you can have the safe passage on a side of a two-way block instead of the middle if you so desire.
7. Creating traps
The two-way block can be considered as a trap, but there are a bit more powerful alternatives to that. If you want to create a trap, you will need a very narrow passage or you need to narrow it down with a wooden wall. A trap is essentially the same as a one-way block but the spikes should be facing you instead, allowing enemies to easily hop in but making it very dangerous as they cannot escape through the route they came from.
The correct place to do this is on a battle front where you have allies around to fight the enemies that jump over. I wish there was a button that you could press to flip the direction of the spikes but for now, you just have to be quick and brave. If you have ever thought that it is annoyingly hard to kill a backpedaling shield boi, well guess what, this is how you do it in no time.
Some other good placements for the spikes include the top of the ladders and on climbable ledges that can only be climbed up from certain spots as well as the areas where people jump of the walls for example on the Camp map.
Instant kill trap
Yes, this does currently exist in the game, an instant kill trap, and you can have at most 4 of them at the same time.
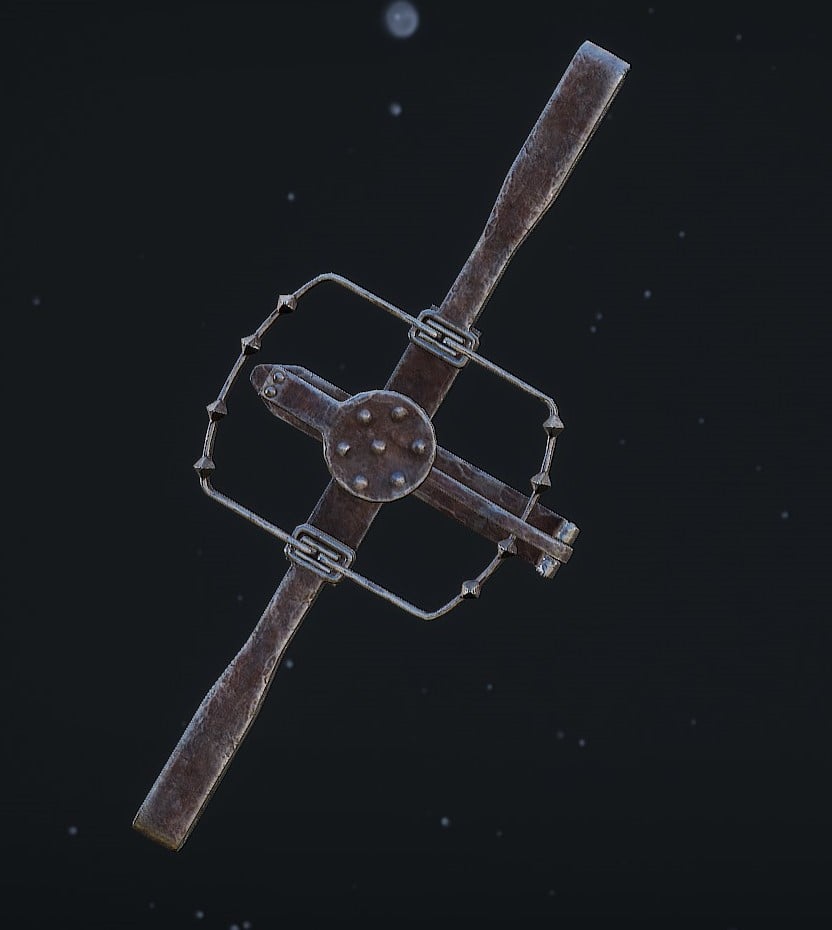
Let me introduce you to the bear trap:
The bear trap is a consumable item that can be placed down. It will close on a player that walks over it, dealing 50 damage and always knocking the player backward, with relatively high velocity. Once placed you can go to a resupply chest and obtain an other one. A person can have a maximum of 4 bear traps placed on the ground at the same time.
You can build an instant kill trap by placing a bear trap under fully finished spikes as close as the game allows. If you place it before finishing up the build, you can actually have the bear trap so close to the spikes that it never activates. When correctly constructed, the trap will instantly kill a person walking to it from any direction as the fall down animation begins inside the spikes, instantly killing the person.
However, it is completely safe to walk over the spikes from the non-pointy end. Only backpedaling in high armor over the spikes will harm you, and even then only the trap will go off and knock you away from the spikes dealing 50 damage. For some reason, if you crouch backpedal over the spikes it is completely safe, even when wearing heavy armour.
8. Providing protection
Provide protection from horses
This should be the only reason you close a passage with spikes pointing towards the enemy. You can spike against horses by placing 6 spikes here and there or if there are many horses giving you trouble, it can be a good idea to close a passage with spikes.
Provide cover on an open area
Specifically on Camp, there are some moments when the battle happens on an open field so that there are not many passages one could close or trap. In that case, the most sensible thing to do is to use all your supplies for wooden walls and provide cover, either for your archers in the back line or if you are a battle builder, drop some for your front troops as you go.
9. Adding pressure and combining it all
For adding pressure to a choke point, you should have gathered 6 supplies so that you can build a mounted crossbow. Place the crossbow near the choke and try not to shoot your allies. The crossbow is very inaccurate at long ranges but from a short distance, you can quickly kill the first few brave souls that dare to push through.
Combining it all
After you have learned to build the basic style formations, it is time to mix it up and combine all your knowledge. Once you figure out the good spots, which depend on the map and the state of the battle, you can try to convert your blocks and pressure points into nests.
Nests basically combine the pressure of the mounted crossbow with the stalling and trapping capabilities of the other structures. There are no right way to build them.
10. Gear combinations, hammer or no hammer?
As previously stated, the battles in Frontline are often very dynamic. For this reason, you don’t actually even need to care about repairs if you don’t want to. If you want to repair properly, you should invest 3 to 4 gear scores towards it and reserve an equipment slot for the tool.
The toolbox itself already takes up one slot and half the available gear score leaving you with 8. If you take the blacksmith hammer and the smith perk, you are left with 4 gear score and one slot, which is not a lot. There are a few more different gear options and play styles if you just leave the hammer out.
Hammer/Mallet and Toolbox
If you take the standard route of bringing in a hammer and a toolbox, your combat capabilities are very limited. It is hard to get a lot of efficiency out of the combination and don’t expect to be anywhere near the top of the score board.
This is more of a support build in a sense that you are trying to shut off flanks and create cover for your allies. You can leave the third slot open for picking up a weapon that might be on the ground, but your armour is usually not suitable for close quarters combat.
Medic bag/Fire pot and Toolbox
If you want to build a lot, you should quite quickly see that you are constantly running for the supplies. The front of the battle keeps actively moving so you either need to reposition or rebuild a lot. While you are at it, you might as well grab a medic bag that you can throw for your allies to heal or a fire pot that you can throw on top of your enemies. This way, you can at least get some extra value for constantly running to the resupply create and back to the structures.
Bear trap and Toolbox
This is the build you want to use if you want to create the instant kill traps. Here I would suggest to take the blacksmith hammer as well as you rely on keeping those walls and spikes intact for the traps to work. This play style is more for the fun of the instant kills and is not that effective towards winning the war. However, it is a good source of some giggles. Remember that you can block with the hammer and try to guide your enemies to the bear traps.
Bow and Toolbox
If you leave the hammer out, you have just enough supply for a recurve bow or a crossbow, leaving you with 1 more gear score to spend. That being said, you will have no armour so I suggest picking the crossbow for the range. However, I do not recommend this build as all the objects you can build are more effective the closer to the enemy they are. You will achieve a lot more if you just leave the toolbox out and take a pavise shield and a backup melee weapon, leading to a quite similar play style but allowing for better perks and armour.
Shield and Toolbox
Even if you pick a hammer or a mallet, you will have enough supplies for a shield. I specifically recommend the heater shield as it gives a lot of protection for a low cost of 2 gear scores. Shields are really strong in Frontline for boosting your survivability and it will compensate a lot for your lack of armour. If you want to try out building on the front of the battles, I definitely recommend picking up a shield.
Short spear, Shield and Toolbox
Ahh yess… If you haven’t already heard about the short spear and shield combo in general, you have not really played the game. It is an extremely versatile combo. The damage is not huge but the relatively long reach of the short spear combined with the protection of the shield will make it very safe to get that damage in.
I recommend on picking up that resupply as soon as you spawn so that when you see a battle moving into a choke point, you can drop the mounted crossbow, go poke for a few seconds and then start shooting the enemy heads. Because of the shield, you can continue firing until the enemies actually reach you, as the shield should allow you to backpedal to safety while generating some resistance with your pokes.
This is a very active toolbox build. If you are decent with your combat awareness you should be able to take part in the battles quite well in addition to applying that extra pressure to the choke points or blocking them if needed, either with a quick full block or partial block. Just remember that you still do have low armour, so do not dive in too deep, pick your engagement timings and try to go for those pokes from the side.
On top of everything, you can of course throw the spear to finish off a fleeing enemy or land a kill on an unsuspecting archer. Just make sure that if you miss the throw, there is something to stop your spear as the weapons do have a relatively short timer before they disappear, not giving you too much time to pick it up.
This is the build that I feel contributes the most for the battle from all the toolbox builds.
11. Horde mode
There is a separate balancing in the Horde mode. The toolbox costs 225 gold which is quite a lot, so you need to get around the mid game in order to use it. In addition, the supply comes with packages of 2 and the package costs 50 gold to purchase. In Horde mode, the toolbox has a limit of 10 supplies instead of 6 and initially comes with 4 supplies. The wooden spike cost is increased to 2 supplies in Horde mode but everything else is the same.
The following text contains spoilers for how to complete the horde mode easily, so if you want to figure it out yourself, don’t open the spoilers.
Due to the high cost of the toolbox, it is only accessible in mid game, but once you get there, combine it with a bow and you cannot be killed. You should first prioritise obtaining a bow and then the toolbox and a blacksmith hammer. If you want to go for a budget option, obtain the blacksmith hammer first for 30 gold and then go for a recurve bow for 100 gold, find a tower to camp and farm the final 225 and build some spikes below the ladders. If you happen to have 275 or more, build the mounted crossbow first instead.
Get to any tower with ladders as the bots cannot climb them up and build a mounted crossbow on top of it for free infinite ranged damage. Once you have the time, place spikes behind doorways and around the ladders as the bots will push each other into the spikes, killing many before they are able to smack them down.
The most dangerous enemy are the red firepot dwarfs that spawn for the last couple of waves, you should prioritise killing them with any bow and your mounted crossbow. Avoid towers with only simple wooden floor as the fire pots can be thrown through and try to place spikes on small choke points to slow the enemy down.
