Are you having trouble finding the Gold Bar in Filly Astray? If you don’t know where to find these mysterious other collections, our guide will help you. This Filly Astray Collectibles guide contains detailed information that will help you find all the gold bars and special collections on the mare’s path!
This is the guide Meteorite Shower it was created by. You can find the author’s link at the end of the guide.
Filly Astray Collectibles Guide
This Filly Astray Collectibles guide aims to help you find and collect all the Gold Bars and special collectibles in Filly Astray. Upon completion, you should then be able to unlock both the Lods of emone and Pet the Dog achievements.

This guide will walk you through the collectibles’ locations in progression of when you’re able to encounter them first. The mystery collectibles will have the following icon to denote them if you just skimming for those: 
There are several areas to travel through, Sewers, Caverns, Mines, The City, Forest, Castle, Underforest, and the Workshop. As you travel, you’ll meet Goony, who’ll help you warp back and forth between these areas. Use Goony and this guide to help locate your missing collectibles.
Tips
If you want a rough guide on what to look out for, rather than be spoiled outright on locations, here’s a few tips:
- Breakable walls have very distinct cracks in them. There are no breakable walls without them, so don’t waste time punching every wall in sight.
- Not all breakable walls contain collectibles. Small, out of the way cracks usually hide a mug of beer, which fully heals you.
- Hidden passages do look like regular walls, but there is usually some kind of clue to their locations. Water pouring out from the side, or a suspicious foothold (or hoofhold, rather) that apparently goes nowhere.
- Sometimes the scenery may hide a path to a hidden area.
- Learn the jump kick combo (down, up, attack). Not only is it a fun move to chain into during combat, but with great timing you can perform it midair during a jump to get yourself even higher. Assigning Up to Jump in the options menu also helps pulling this off. There is currently one Gold Bar that seemingly requires this midair move.
- The midair jump kick is also great for skipping certain sections, if you would rather not go through an entire area again, just to get to where you last were.
Area 1: The Sewers
Gold Bar #1
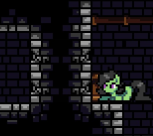
The first Gold Bar is quickly found after starting. Once you leave the brief tutorial area teaching you the controls, you’re soon tasked with jumping over a watery pit, with a pink slime patrolling the platform you’re looking to get to. Once you’re past that, jump up the first midair platform, and climb all the way up, to a thick breakable wall just on your left. Break through, and jump across the following midair platform for your first Gold Bar.
Gold Bar #2

Progress onwards until you’re forced to wade upstream, with pink slimes dripping goo for you to avoid. A crate will float by, but above that is a single wooden platform for you to balance on. Directly across from it on the left, you can see water flowing out from a seemingly solid wall. Jump at it from the platform to find the second Gold Bar.
 Sewer Collectible #1
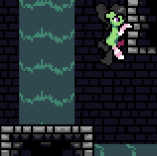 It’s very easy to walk right past this one. Just after getting Gold Bar #2 and moving past the pink slimes, there’s a cascade of water you walk behind. Immediately to the right of that however, is a small hoofhold that seemingly goes nowhere. Jump onto it, and jump off again to the left to jump off a platform behind the waterfall to a small alcove containing the first Sewer Collectible, which seems to be the business end of a key.
Gold Bar #3
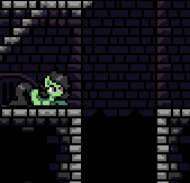
This is a sneaky one, this is. After you enter the tunnel with the never-ending flying… things?… and get past the brief wall graffiti telling you about your Special, there’s a dark, empty pit under some stairs. Since all the other pits have water in them, this is noticeably different, but not if you’re not thinking about it. Jump down it for Gold Bar #3.
 Sewer Collectible #2
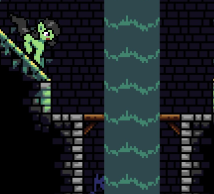
The second Sewer Collectible continues the trend of hiding entrances behind waterfalls. After you speed down this slimy slope, turn around and drop down the hidden break in the platform behind the waterfall for the second Sewer Collectible, and get yourself a complete key.
If you’re having trouble getting yourself down, try pressing down while facing the edge to lower yourself that way.
Gold Bar #4
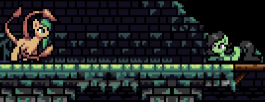
The fourth Gold Bar is locked behind a fight. Get through the waterway where you have to cross via floating crates, and make your way to the tentacled pony standing guard, throwing garbage at you. Defeat her to make the Gold Bar appear.
 Sewer Gem
Technically, this is part of the Caverns level, but it’s still the Sewers. After beating Goony in a boss fight, she’ll let you travel to the next area. With key in hoof, you should be able to jump across the gap, to the secret area. If you fall, don’t worry, just carry on with the Caverns until you find Goony again. She’ll let you come back here.
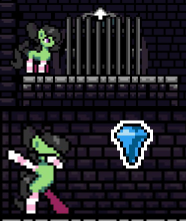
Once you’re across the gap, carry on and make your way up the platforms to the top. Don’t worry about the passage to the left; we’ll be going there afterwards.
Once you’re at the top, take care of the tentacled pony and flying eyebat, and make your way up to the large gate up above. The key will allow you through, and after a short platforming section you can find the Sewer Gem, the first of three.
Gold Bar #5
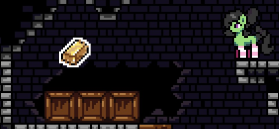
After collecting the Sewer Gem, exit out the gate and continue left. There, you can make your way down into the passage we passed by going up, and going further down, Gold Bar #5 waits for you.
After collecting it, drop further back down to meet Goony again and then jump down the pit for real this time.
Area 2: The Caverns
Gold Bar #6
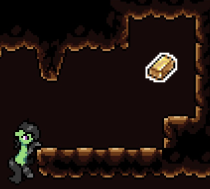
After leaving the Sewers, keep going until you reach a short wooden bridge with a waterfall going past it. No secret entrance this time, but just a bit after that, there’s a hidden passage up on a ledge, hiding Gold Bar #6.
Gold Bar #7
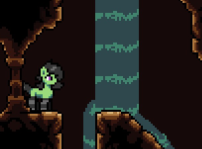
Continue down the winding path, fighting eyebats and surprise crabs as you go, until you meet and fight your first Green Lizzard. After you beat them, you’ll encounter this waterfall soon afterwards. Down the narrow gap is a breakable wall with beer for health, but instead ride the water down the slope, and be prepared to jump quickly onto the platform opposite. Walk across and drop down the first gap, and then walk back to find the seventh Gold Bar.
Incidentally, you can identify the crabs before they drop from the ceiling because the scenery partially covers them.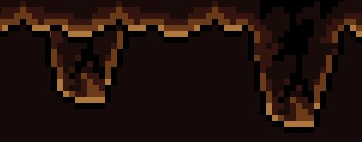
 Caverns Collectible #1
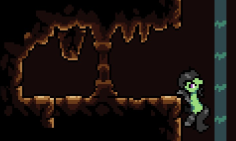
This was the last one to elude me. It’s very easy to miss, and nearly impossible to backtrack to if you do. After collecting Gold Bar #7, drop down and ride the waterflow off the ledge, but as soon as you do, hold left. You’ll catch the ledge of the secret area just under you, and after defeating the eyebat and crabs within, you can collect the first Caverns Collectible. (or you can just dash in and grab it)
 Caverns Collectible #2
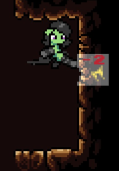
Moving right along, after you’ve finished wading in water, you’ll encounter a large area with sand worms spitting bones back and forth. Defeat the first two, and a third will be shooting his projectile exactly where you need to break the wall. Doing so reveals a mug of beer, but also a whole passage that loops around to the second Caverns Collectible. Defeat the enemies along the way, and it’s yours.
And take note of that Gold Bar we see on the other side of the wall.
Gold Bar #8
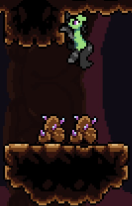
To get to it, drop down the pit we just crossed and continue left across the broken bridge. When you come across a platform with two gem rocks on it, look above it to find a suspiciously placed hoofhold. Latch onto it, and jump off into a hidden passage that leads straight to Gold Bar #8.
Gold Bar #9
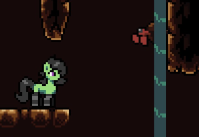
The ninth Gold Bar is hidden away during the rising water segment, after the Giant Enemy Crab boss fight. When the water rises, jump off the crate to the right to get to the second crate you see and ride that one instead. When you can get off, stop on the platform where a crab drops down in front of you, and turn around. Hidden in the wall with the waterfall is a hidden passage with Gold Bar #9. In fact, if you wait long enough, a crab will fall out of the wall, hinting that it’s there.
Area 3: The Mines
Gold Bar #10
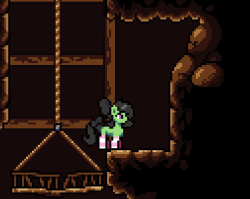
In the mines, you’ll start encountering a lot more Lizzards of different varieties. Battle past some, drop by Goony in the house (pick up the beer hidden in the cliff wall above the house if you need it) and proceed onward. After you encounter and defeat your first Red Lizzard, activate the lift, but get off to the right as soon as you can. Gold Bar #10 is hidden behind the lumpy wall.
Gold Bar #11

Gold Bar #11 isn’t until you reach the area where you need to activate a bunch of TNT to proceed forward. When you go through the first doorway (after setting off some TNT that kills an eyebat) proceed until you get past a pink slime and a sand worm. Ignore the first doorway for now, and proceed to the doorway on the far right. Worming your way down, go further down past the exit, (setting off more TNT that kills a sand worm) and head to the left for the Gold Bar.
Area 4: The City
Gold Bar #12
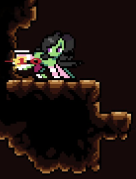
After blowing your way out of the mines, you’ll quickly enter The City, full of Lizzards. When you encounter a Green Lizzard cooking their meal, ignore them for now and enter the doorway underneath. It’s a dead end for now, but here you can quickly jump up above the entranceway, and kick in the wall to reveal Gold Bar #12.
 Caverns Collectible #3
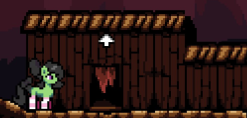
yes i know we’re in the city now but shhh
After fighting your way through the first part of the city, you’ll encounter and fight a Red Lizzard. Once they’re defeated, activate the switch to make the nearby lift work again (and allowing direct access from the area we got Gold Bar #12 from). Ride the lift up, and exit through the doorway to the left.
Once outside, head right and enter the house just there. Inside is a tough fight against both a Red and Pink Lizzard, but once they’re defeated you’ll collect the third ‘Caverns’ Collectible and turn it into…
uh…
Something, I guess. I honestly don’t know.
 Caverns Gem
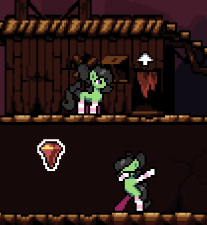
After exiting the house, continue right and jump across to take care of the Blue Lizzard, then enter the house just to the right. Inside are a bunch of Green Lizzards (and a mug of beer on a nearby table). Deal with them, and the one busy fishing, and to the left is a previously boarded-up doorway that you can now enter. Just inside is the Caverns Gem, the second gem you need.
Gold Bar #13
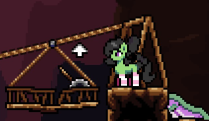
Not quite done with The City. After exiting the house, jump up above and ledgegrab onto the lift hanging there (fighting or avoiding the eyebats as you go) and climb up. Go left, defeat the enemies there, and drop down on the other side to find an horizontal lift with a switch on it. Jump aboard, throw the switch, and let it take you to Gold Bar #13. Oh, and Goony!
Area 5: The Forest
Gold Bar #14
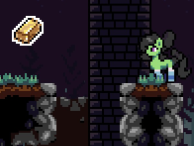
You can’t miss this one. (well, I suppose you could if you actively avoid it)
It’s shown to you on the far left as you’re unceremoniously dumped into the forest. A hidden passage in the rock face let’s you climb up to it.
Gold Bar #15
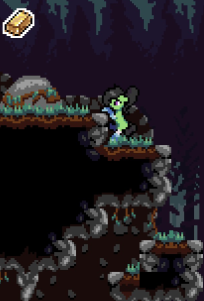
A short walk onwards (after reencountering Goony) there’s an outcrop rising up (just before a harpy pony fight). Climb up it to find the next Gold Bar.
Gold Bar #16
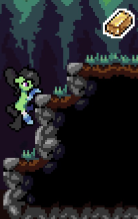
After the harpy pony, carry on until you encounter a rock wolf. Avoid it (or fight it if you’re daring) and climb upwards. Head left, avoid the rock pups (or fight them if you’re cruel) and climb up the outcrop above for the 16th Gold Bar.
Gold Bar #17
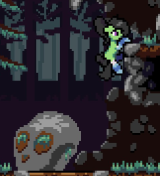
This one requires you to choose from a split path when exiting an area. Here at the skull rock, climb up and go above to exit. From there, go past the two crates, and jump across to the other side. You can see the Gold Bar above you, so go around and jump up to get it, but be careful not to wake the large rock wolf sleeping nearby.
…However, if you still need the No Doggy Paddling achievement, you could always let it (or one of the others) chase you into a space where it gets stuck while you’re free to whale on it.
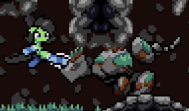
 Forest Collectible #1
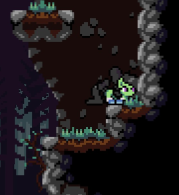
After escaping the two large rock wolves by Gold Bar #17, a third large rock wolf is patrolling a wooden platform. Wait for it to walk away, then quickly climb up the cliffside, to find a hidden passage. This hidden passage doesn’t stand out, but you’re likely to ‘fall into it’ while climbing up. Inside is a doorway that leads to a looped room with two more large rock wolves. Head right to go down and back left for the Forest Collectible, but make sure to avoid letting the rock wolves see you, or they’ll give chase (and likely tear you to shreds).
 Forest Collectible #2
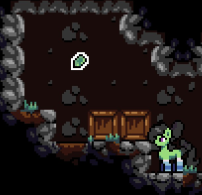
This one is super quick to grab. After exiting from the first Forest Collectible and leaving the area, walk forward and jump down the cliffside. At the bottom is a skull rock, and just to the left is a hidden passage with the second Forest Collectible.
Gold Bar #18
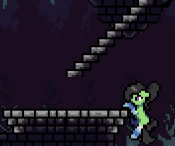
As you proceed into the castle perimeter, you’re ambushed by an archer harpy. Take care of them, and then walk back down the stairs you came up from. Jump across to the right (position yourself off the edge like in the example shown for the best chance to land perfectly), and climb up the platforms to reach Gold Bar #18.
Gold Bar #19
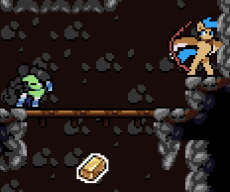
Proceed onward into the next area, and it doesn’t matter which split path you take to get there (the upper path just lets you avoid a fight with a harpy pony). Carry on until you reach this Gold Bar being guarded by an archer harpy (and a pink slime). The archer is actually right in front of the hidden passage to get to the Gold Bar, something you’ll probably figure out when you kick them into it. Collect the Gold Bar, but don’t leave just yet!
 Forest Collectible #3
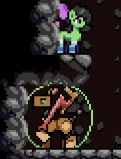
While still where Gold Bar #19 was, walk to the left into the seemingly dead end to reveal another hidden passage. Drop down to encounter a robot pony, with a shield. He’s tough, and can chip damage you through your blocks, but defeat him to reveal the third Forest Collectible, and turn them all into a medallion.
Area 6: The Castle
 Forest Gem

The castle brings a new foe, a harpy with a shield. He can be tricky to damage, but he usually responds to any attack by parrying his shield upwards at you. Respond to the parry by slide attacking (down, attack) underneath while his shield is raised.
Once you’ve dealt with these two guarding this door, step over them and open it with your medallion.
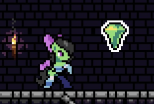
Inside is a bit more perilous. You’ve got two archers to contend with as you platform across. A quick tip, the archers’ arrows are the only projectile you can still block even while facing away from it. (at least, it is on Easy difficulty) Even then, you’ve got yet another shield harpy, coupled with a Blue Lizzard, making it very difficult to find an opening. But once you do, you’ve got the Forest Gem as your reward, the final gem you need.
Gold Bar #20
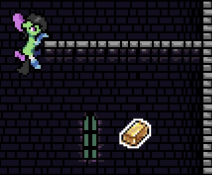
After collecting the Forest Gem, continue right and drop down to find the twentieth Gold Bar. Make sure to fall to the right, otherwise you’ll have to make the loop around all over again.
Area 7: The Underforest
Gold Bar #21
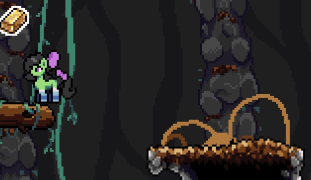
The Underforest brings with it a new enemy, acting as an overall environmental threat. Sentient plants aim to block your path, and unleash skewer-like vines from underneath you. Fortunately these can be blocked, but will keep coming until you take out the main plant.
Left of the second plant you encounter are logs hanging from vines. Jump onto the topmost log to force the camera to reveal Gold Bar #21.
Gold Bar #22
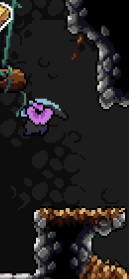
This is the Gold Bar I recommended learning the midair jump kick (down, up, attack) for. As far as I can determine, there is no other way to get to it, only from the extra height you get by performing the jump kick whilst midair.
You’ll find this one soon after #21. It’s above a fight with a harpy pony, while another plant tries to skewer you. I recommend taking out the plant first and coming back before trying to jump up to the Gold Bar.
Gold Bar #23
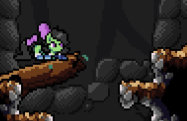
You’ll see this Gold Bar before you can actually get it. After the section where you have to loop around to kick down a second log in order to proceed, you’ll encounter this hole. Jump into it to reveal a hidden passage leading to the Gold Bar.
 ???
???
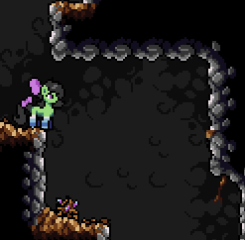
After you move past the section with the swinging logs, and get past the two sand worms working in tandem, you’ll come across the exit. But do not take it. Instead, notice across from you a small out of place patch of dirt on the wall opposite, that is a hidden passage leading to a secret exit. Take that instead.
You’ll be in an area where you’re under constant attack from a plant, which unfortunately you can’t do anything about at this point. Make your way across the the spike pit, making sure to block incoming vines, and you’ll soon encounter a robot pony. That you have to fight. While under threat of skewering.
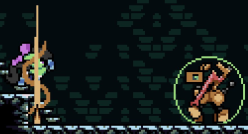
Be sure to block constantly, only attacking when you’re sure you won’t get hit. But don’t take too long, it can still cause chip damage, remember.
But, if you’re victorious, you can then unloc-
Gold Bar #24, #25, #26
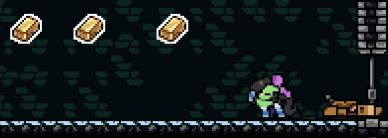
Surprise! As a bonus reward, you get three whole Gold Bars. Collect them (and keep blocking the incoming vines remember), and now you can unlock the three gates to reveal…
 Gem Bracelet
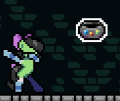
The Gem Bracelet! (at least, I think it’s a bracelet) Congratulations, you’ve just unlocked the ending of the game! Now you just have to beat it…
Area 8: The Workshop (and beyond)
Gold Bar #27
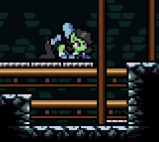
Sure, technically the level is still the Underforest, but nah. As you prepare to enter the Workshop, jumping past little roombas patrolling the platforms you wanna be on, you fight another robot pony, thankfully without vines. Defeat him and just past him is a section of the floor where the platform has fallen away. It’s very easy to just walk over it, but squeeze yourself down there and head left. Don’t worry, you’ll catch ledges before walking off into a watery grave. Tucked away in a hidden passage is Gold Bar #27.
Gold Bar #28
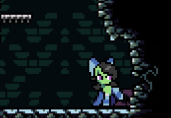
The Workshop (yes, I know the menu calls this area the Sewers) has Tesla coils that shoot electricity out to another opposite, creating electrical barriers. After timing your way past some, you’ll find this breakable wall next to an eyebat. Break it to reveal more Tesla coils, and a tentacled pony trying to snipe you as you cross. Time both your steps and your blocks, and get across and defeat her to reveal the 28th Gold Bar (as well as crates stacked with gold coins).
Gold Bar #29
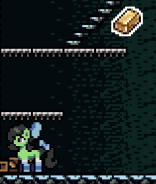
Soon after entering the Lighthouse (oh, now the menu calls it the Workshop?!) you’ll face one last robot pony. Defeat it, and the final Gold Bar will appear. Collect it, and you should unlock the Lods of emone achievement any second now!
…if you haven’t, um, well, I don’t know what to tell you.
Final Words
First off, thank you for reading my guide. I hope it proved useful to you! Second, I’m reasonably sure I’ve retraced my steps of my first playthrough, where I’ve collected all the Gold Bars. But I’m willing to admit there’s a chance I’ve overlooked one. (especially since there’s 29… such an odd number for a collectathon) If you know of one that I haven’t covered here, please let me know so that I may amend my guide.
Anyway, I won’t keep you, go and keep playing Filly Astray!
OH! And don’t forget to pet the dog after you beat the game! Seeya!
