Hello from our Project Zomboid How to Add Mods to CoOp guide. If you are looking for the answer to the question of How to Add Mods to Co-Op, you are in the right place because you will find the details in this guide! Read this guide and add mods to your co-op MP server in 2min or less!
This is the guide dustylunchbox it was created by. You can find the author’s link at the end of the guide.
Project Zomboid How to Add Mods to Coop
Welcome to our Project Zomboid How to Add Mods to Co-Op guide. Read this guide and add mods to your co-op MP server in 2min or less!
Step One. Choosing your mod/s
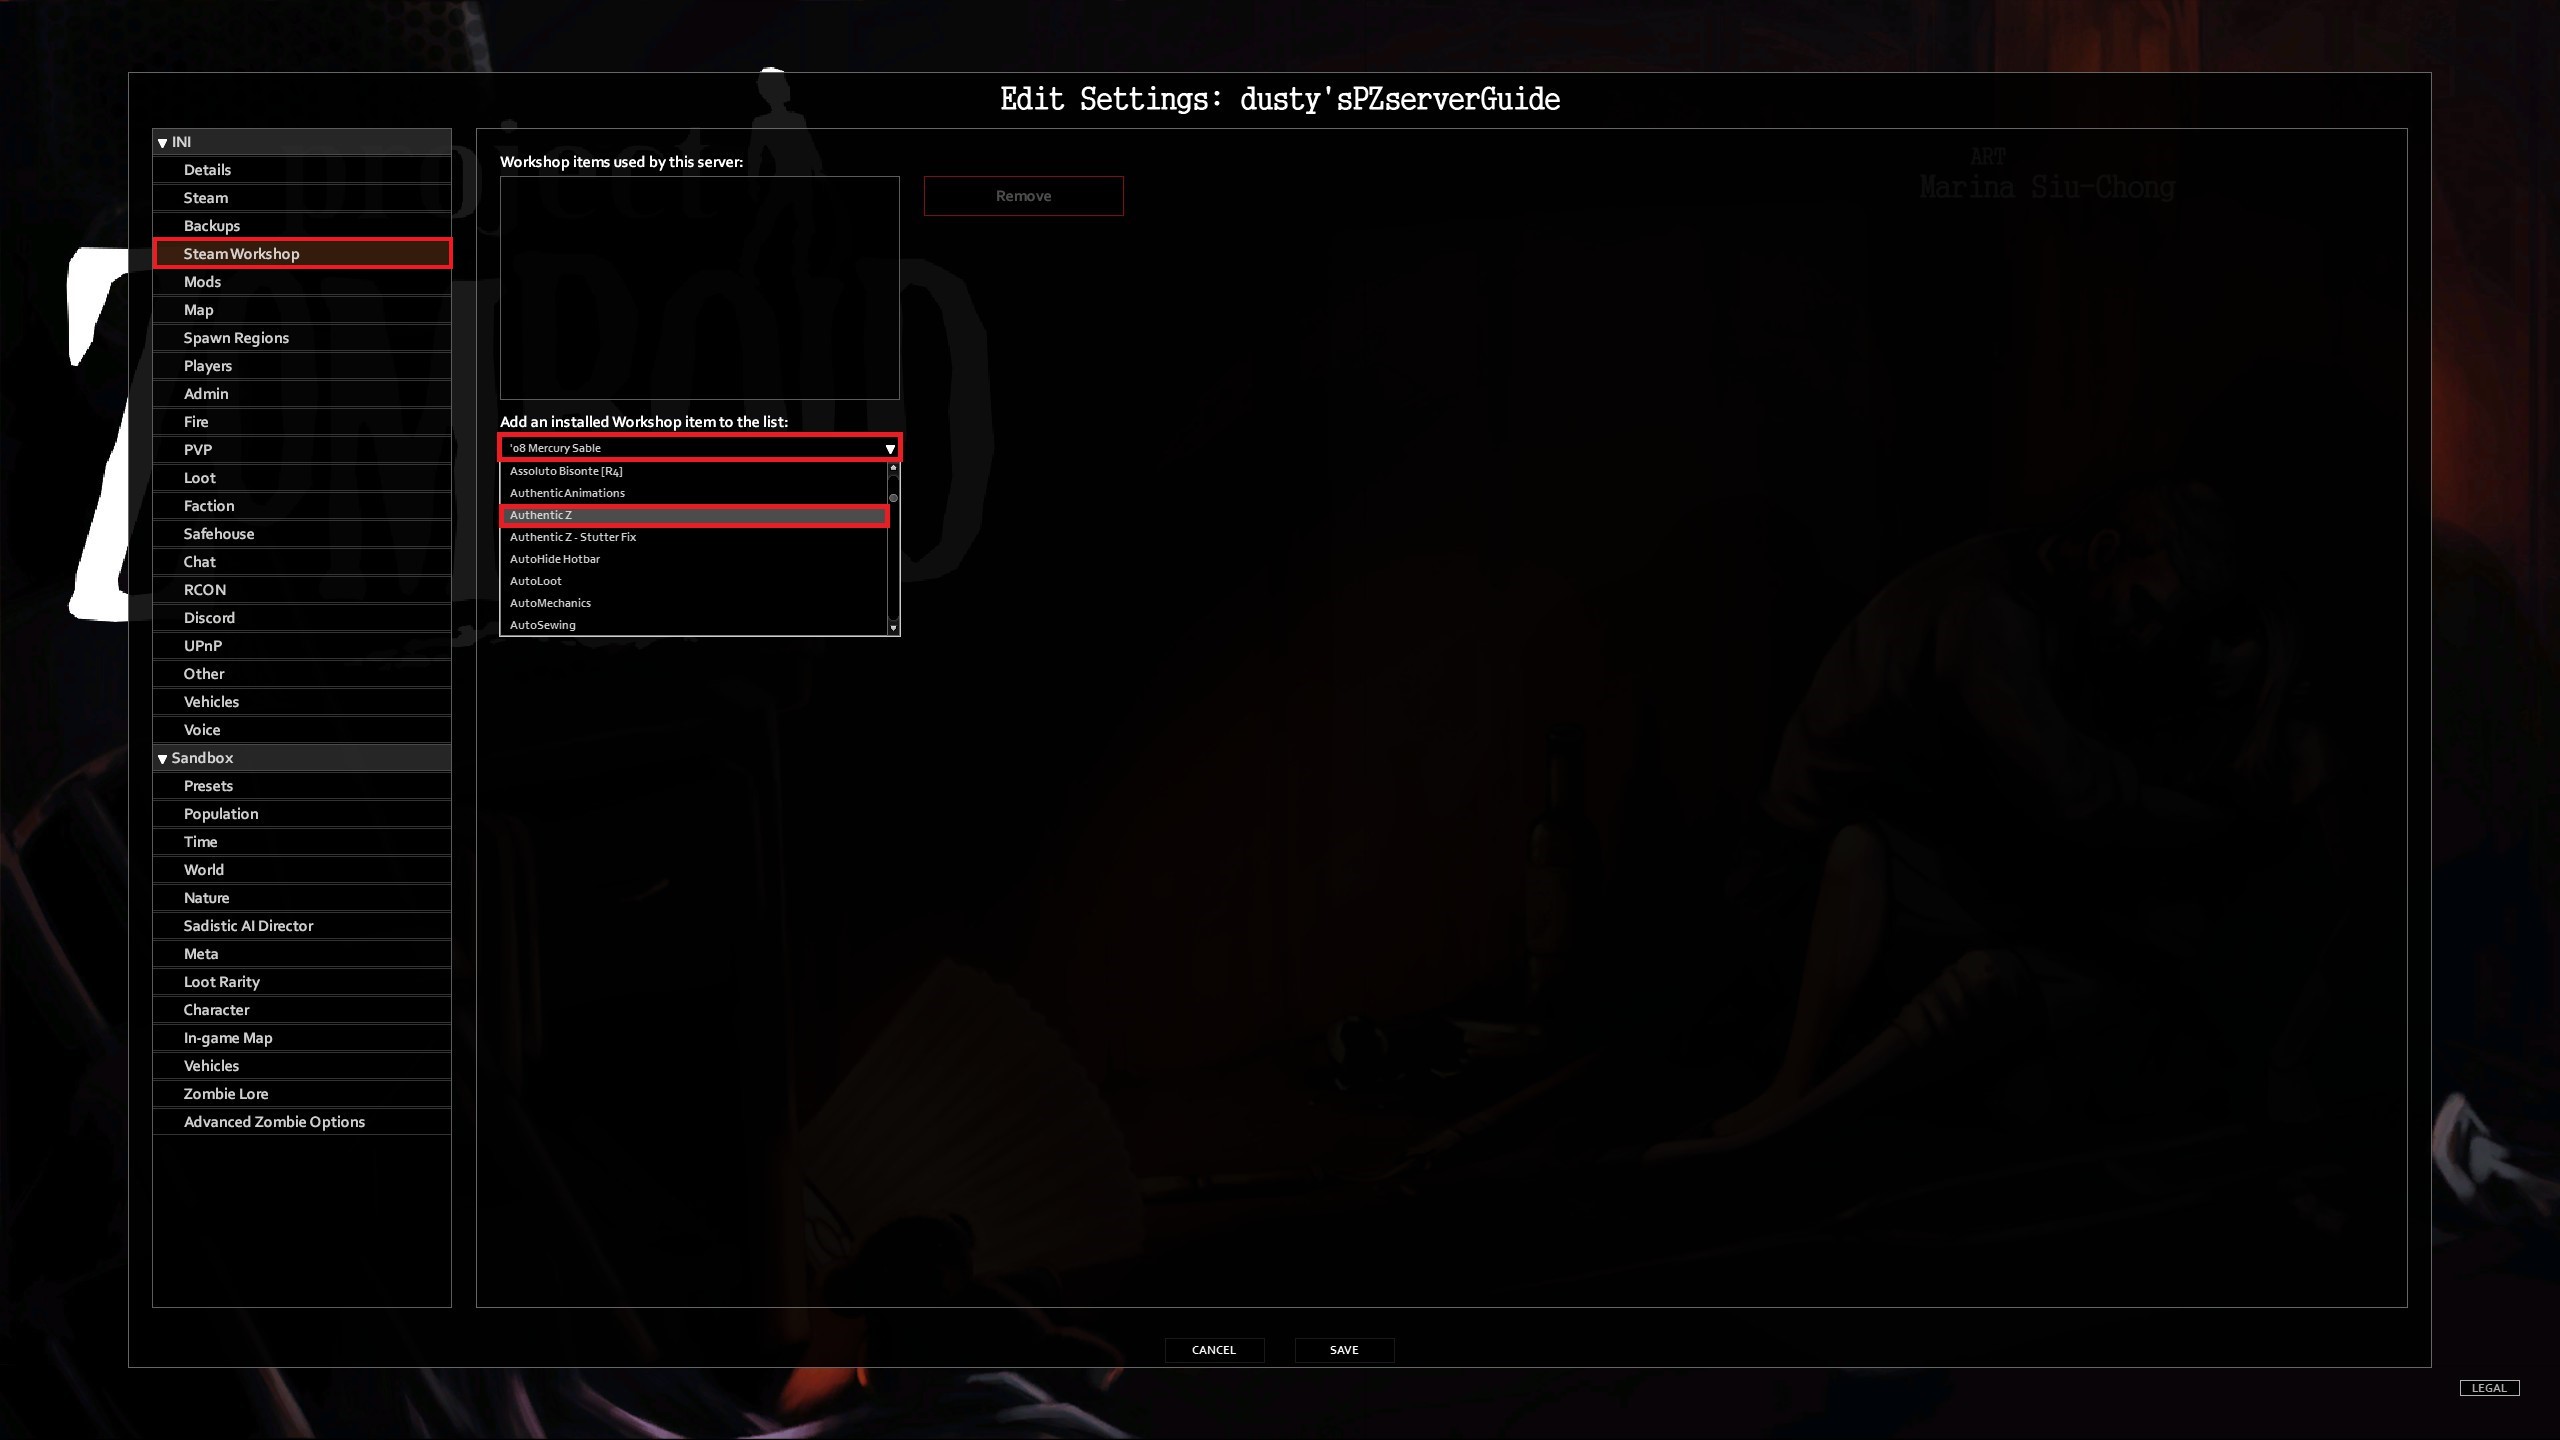
From the Edit Settings Menu, Navigate to ‘Steam Workshop’. You will see A box that should be empty, and below it is a drop down menu. This is where we are going to choose what MOD/s we want to add to our server. For this guide, I have chosen the what is in my opinion the most popular mod/s that I see a lot of people struggling to setup correctly. How ever, this guide will be the same across all mod/s that’s don’t require editing game files.
Step Two
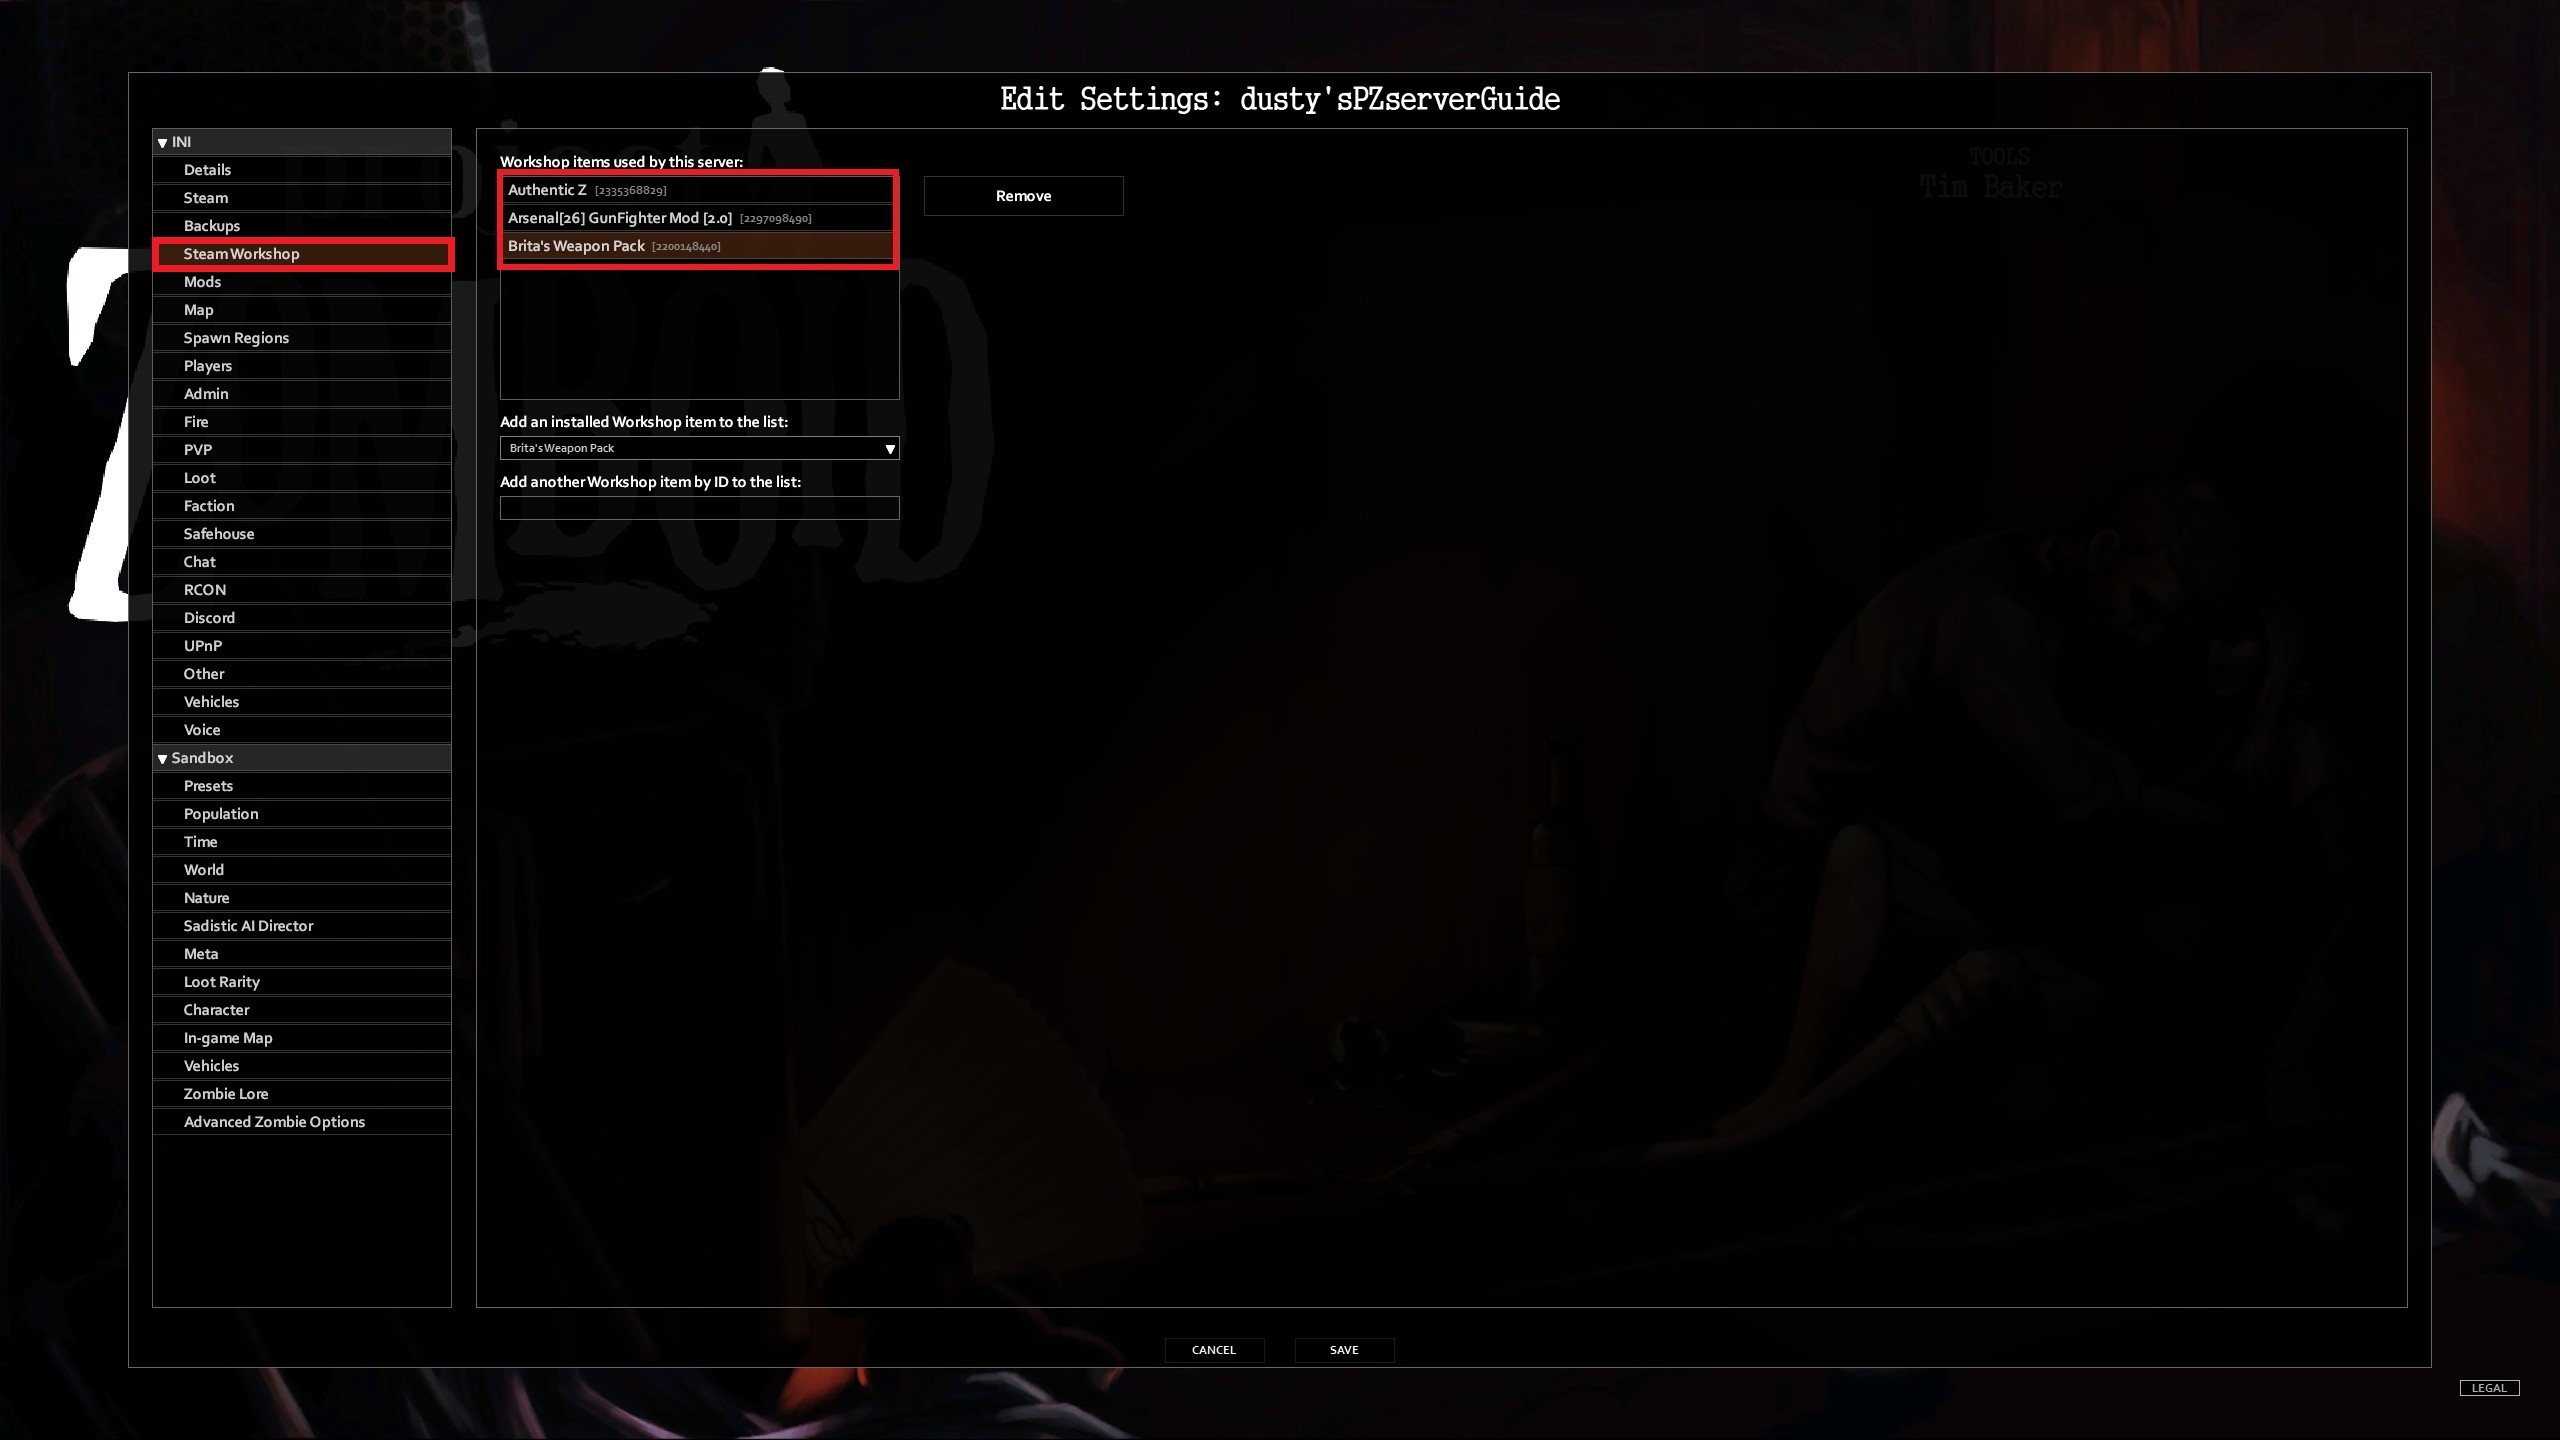
Once you have selected your chosen MOD/s you should See them in the box ‘Workshop items used by this server:’
Step Three
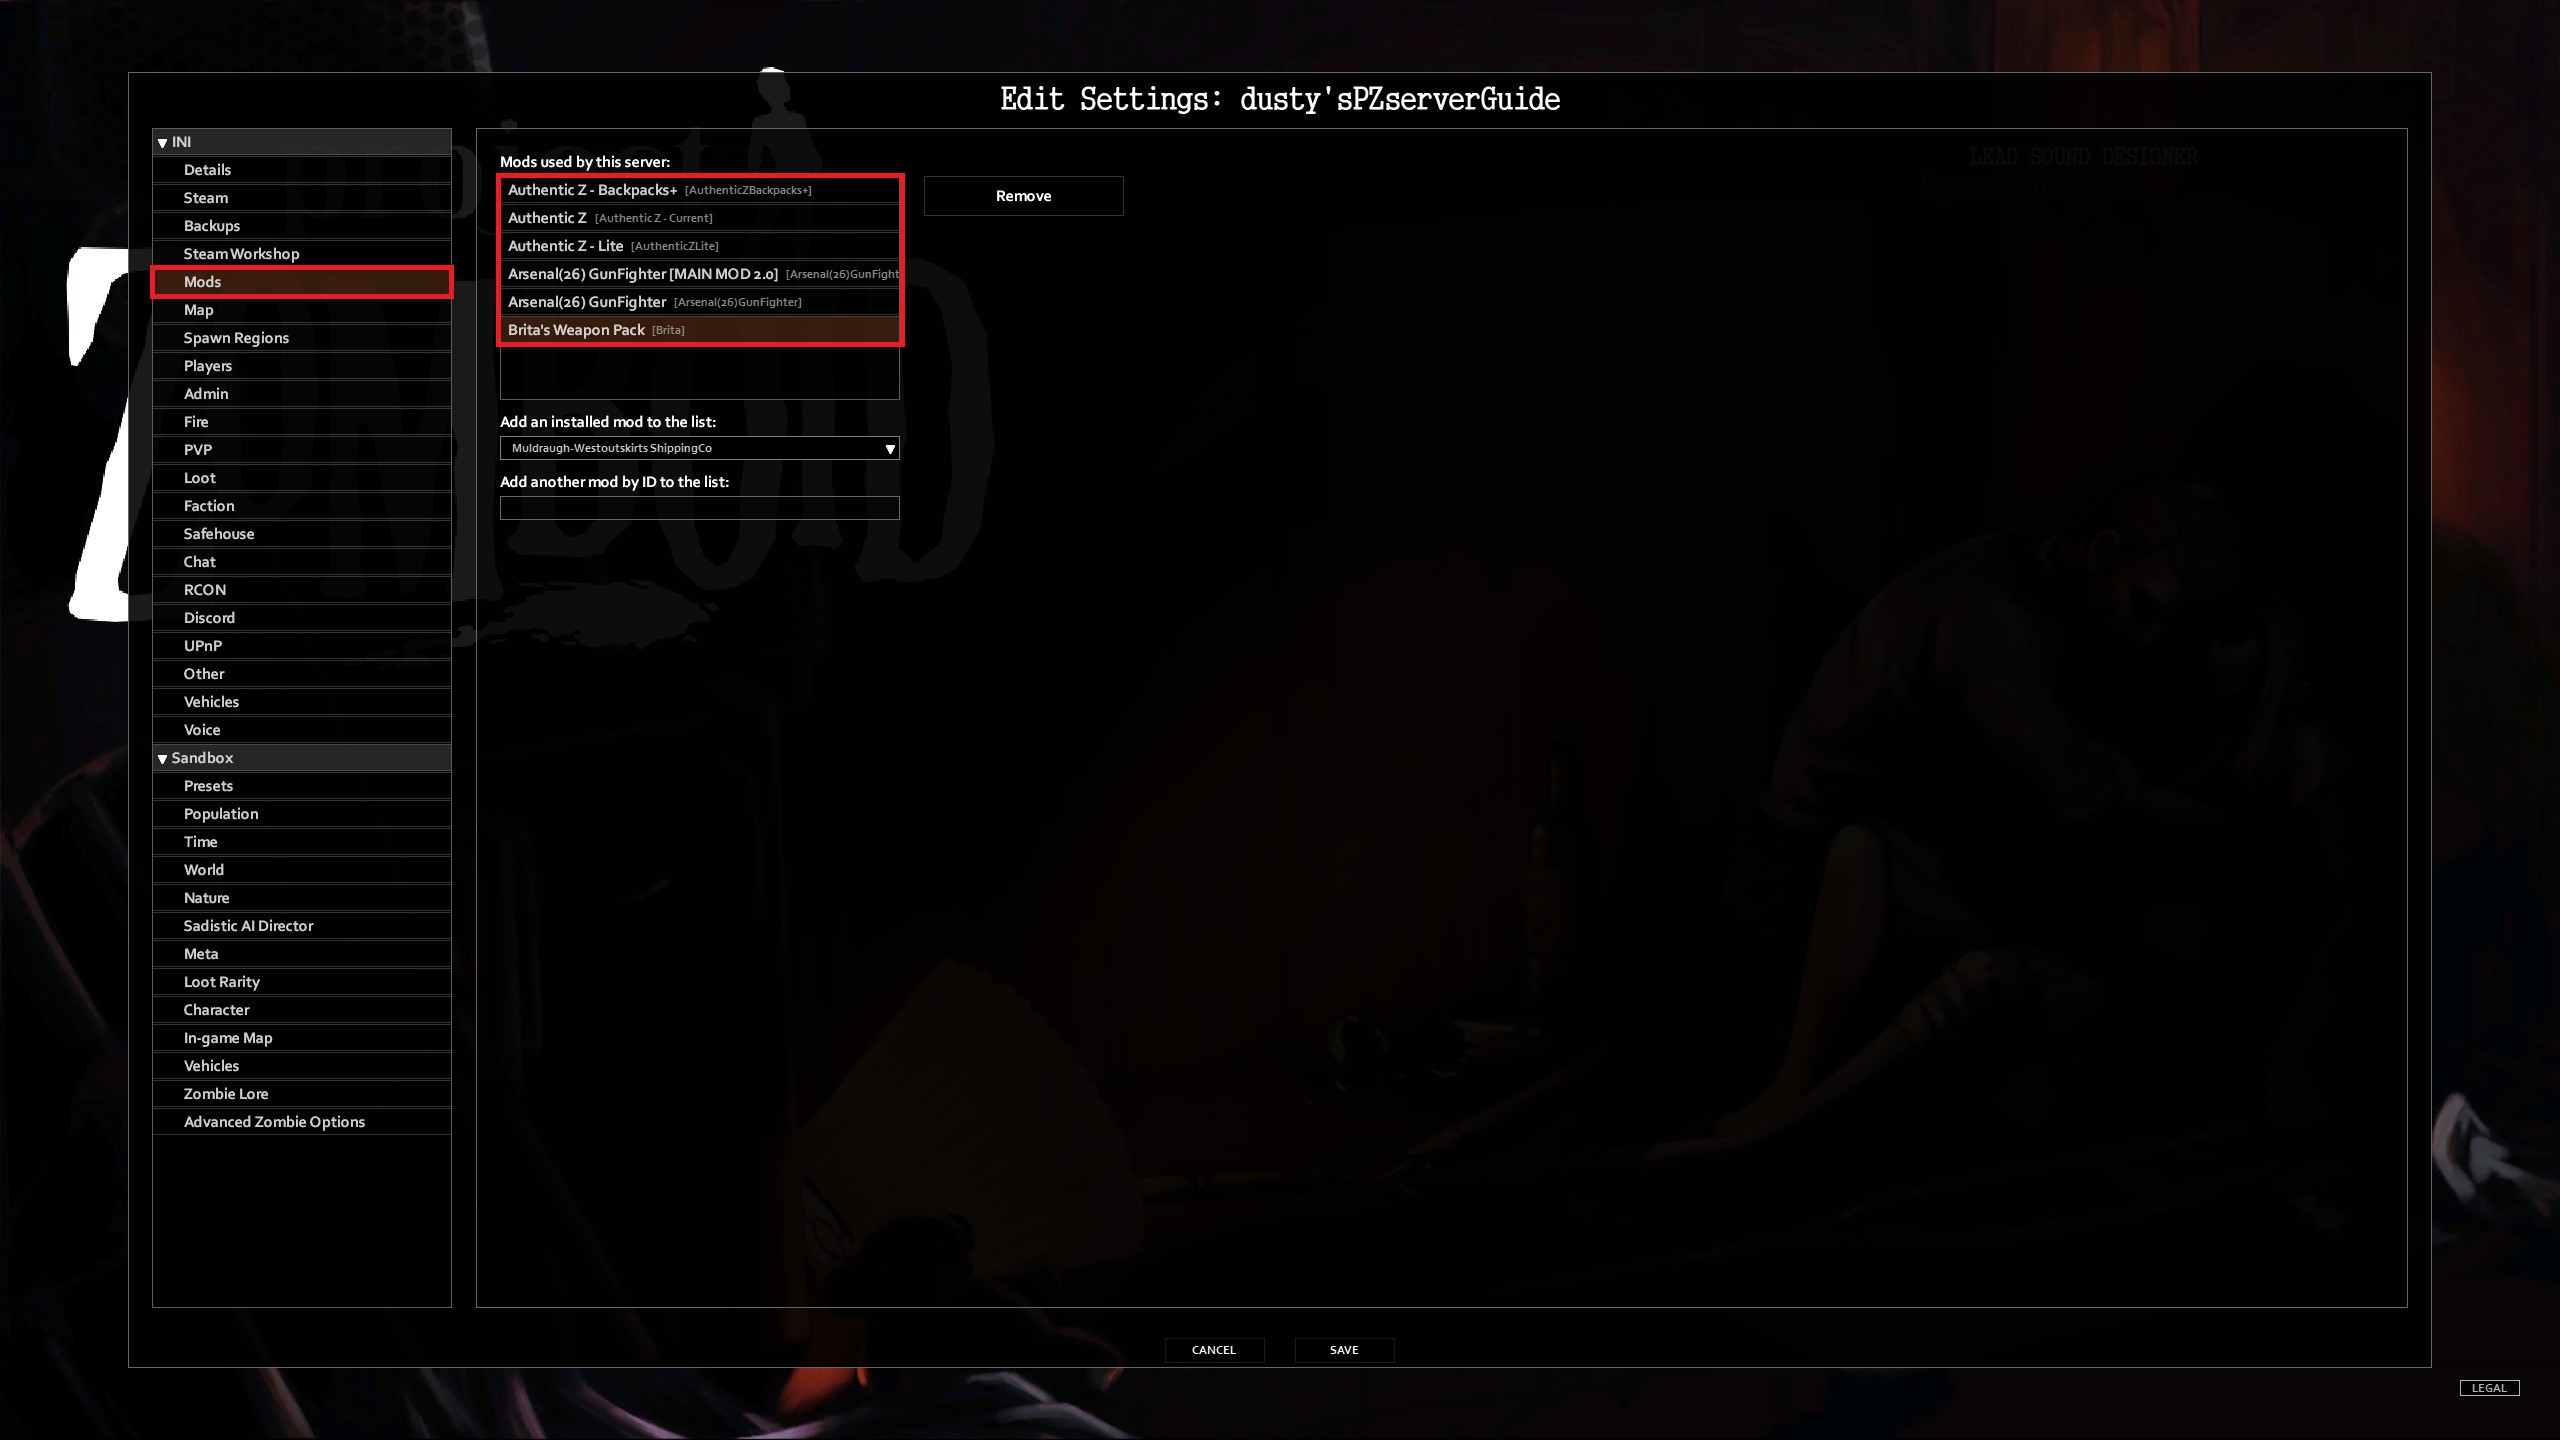
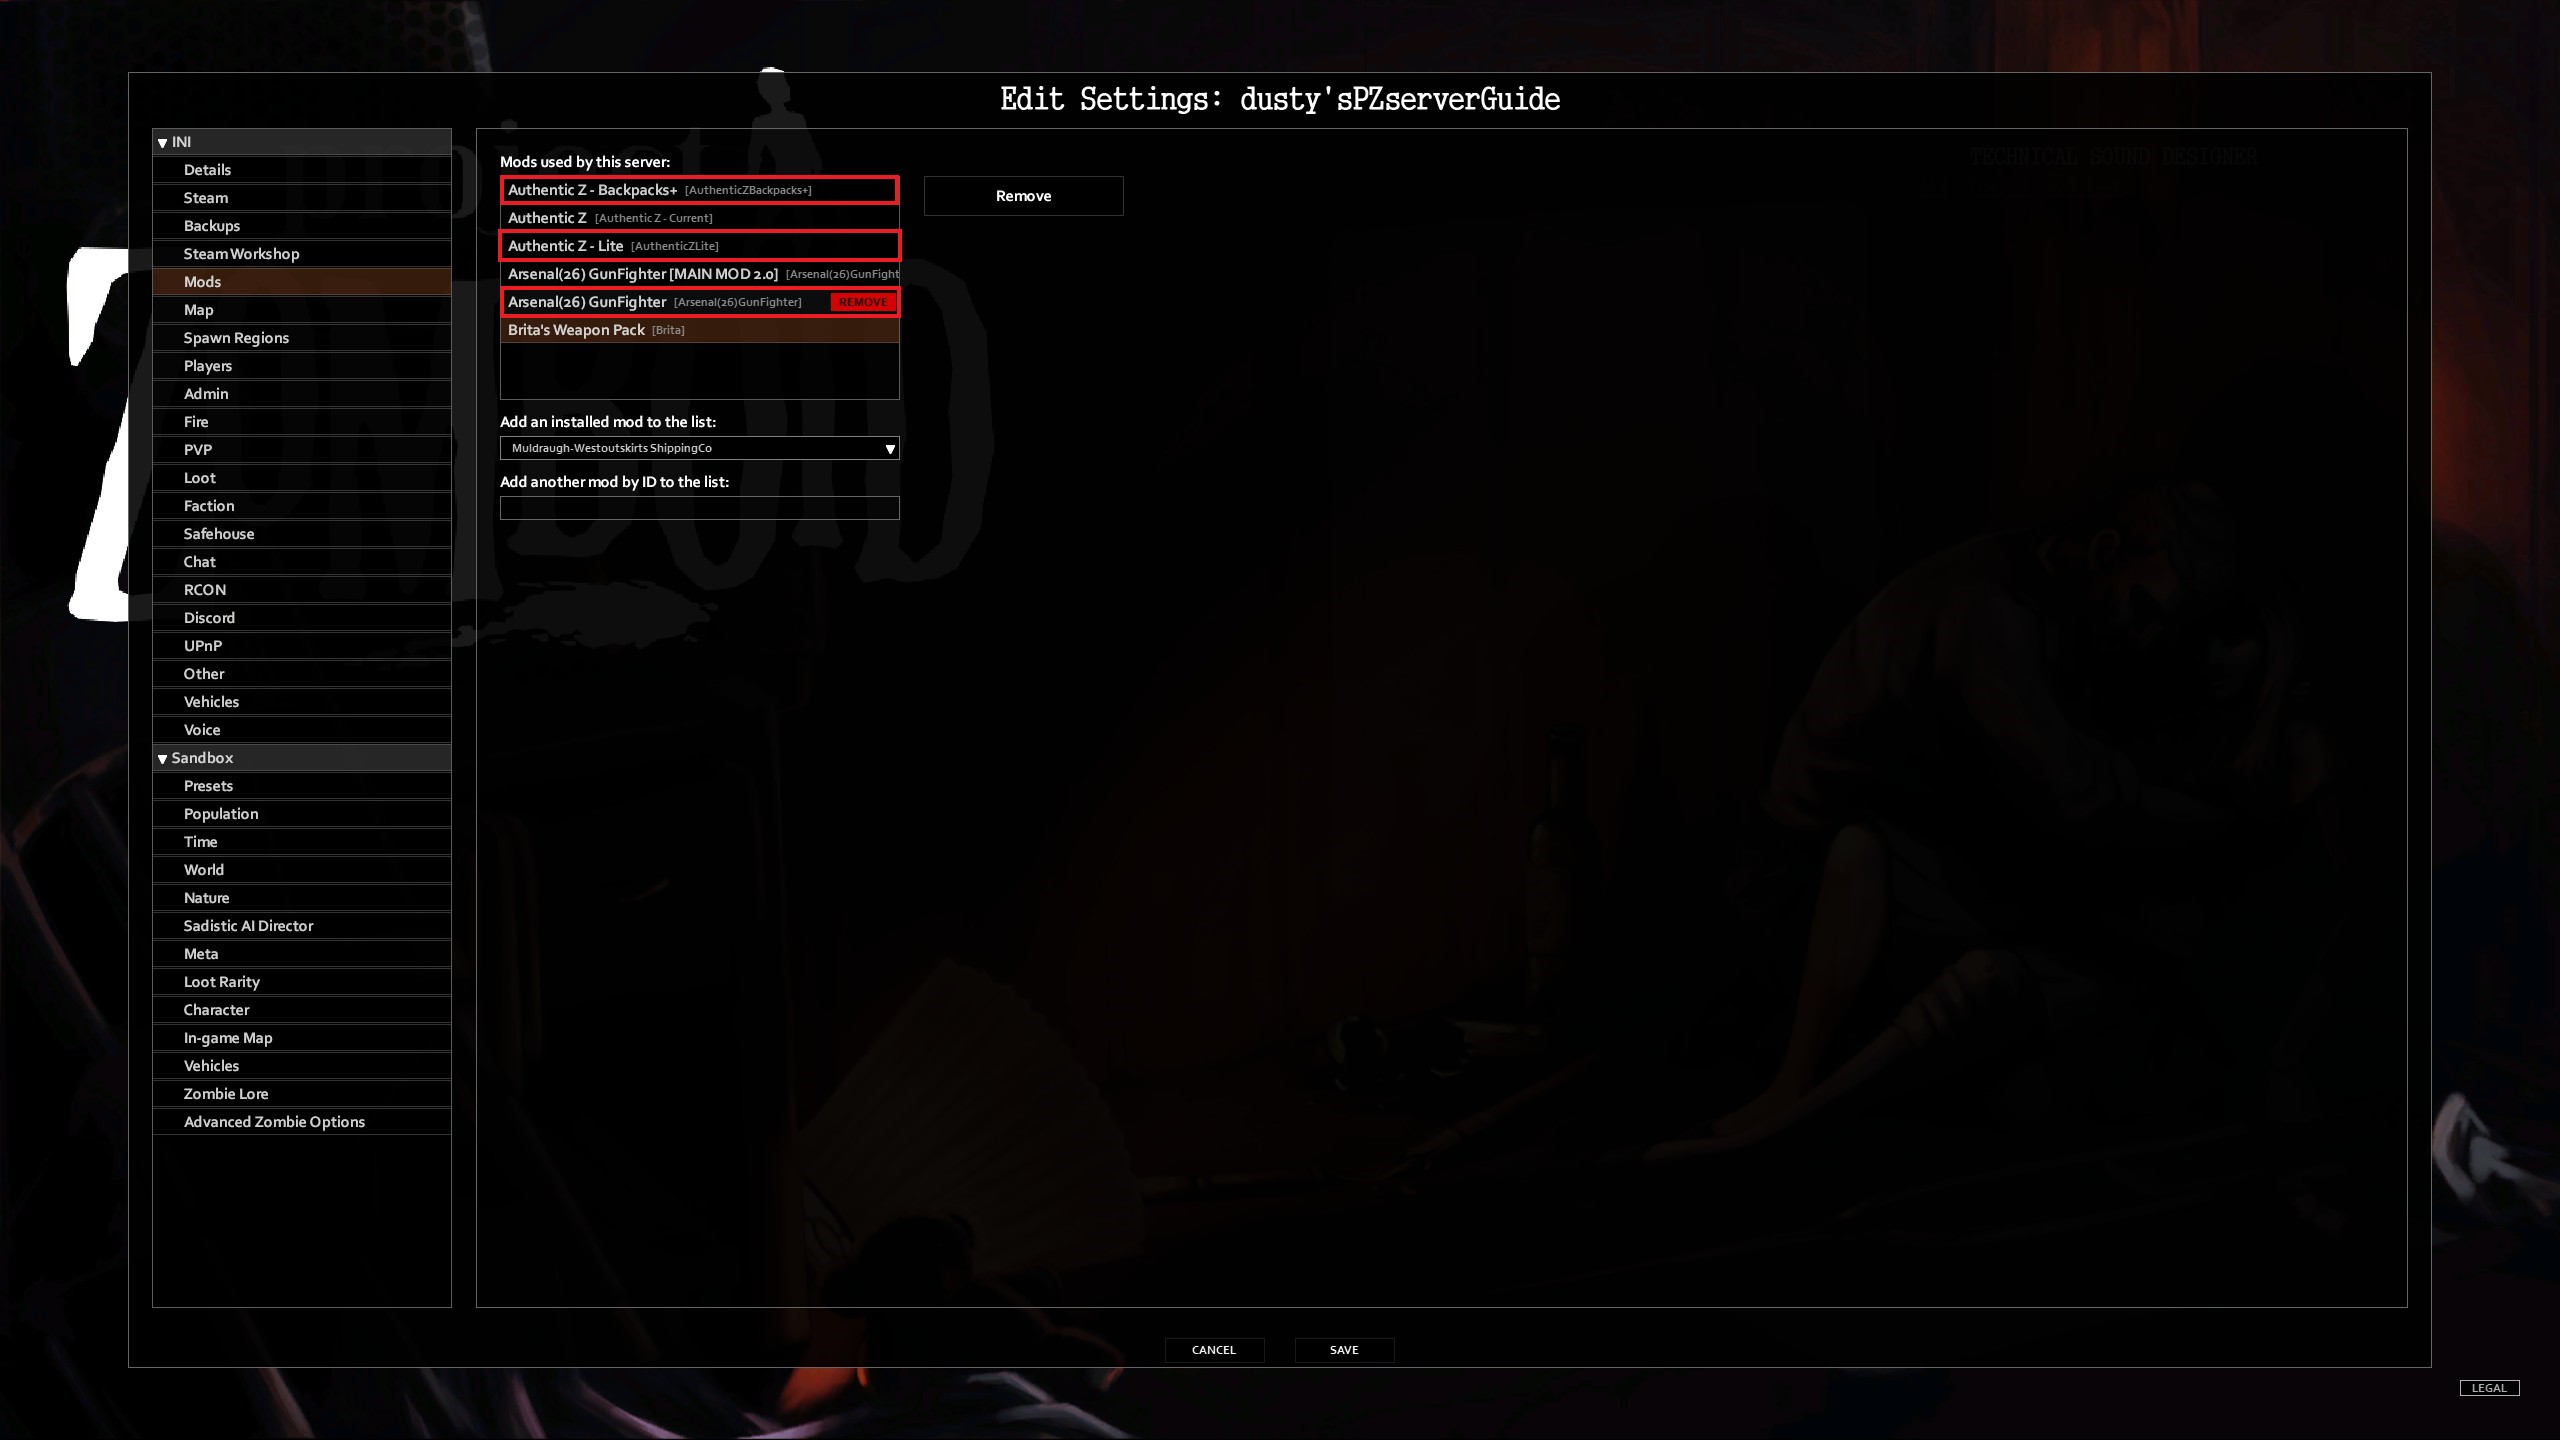
Now you need to navigate to the Menu below ‘Steam Workshop’ titled ‘Mods’. Don’t panic if you see more Mod’s than you did in the steam workshop section, I will explain this process in Step Four.
Step Four
The reason you are seeing Multiple mods in the menu is because some mods offer more than one way to play them. AuthenticZ adds a lot to the base game like Outfits and Bag upgrades. Some people may only want to add the outfits, but not the bags. Or the Bags but not the outfits. We need to remove the selected mods we don’t plan on using. For this example, I am choosing to use Outfits and Bags. So I will go ahead and remove ‘AuthenticZ – Backpacks+’ and ‘AuthenticZ – Lite’ I will not remove AuthenticZ. For Brita’s Weapons to work, you MUST remove Arsenal(26) Gunfighter and leave in Arsenal(26) Gunfighter [MAIN MOD 2.0] DO NOT RUN BOTH, THIS WILL NOT WORK CORRECTLY.
Step Five
Now your mod Menu should look like this.. Now Navigate to the ‘World’ menu. This is where we can add items for the loot removal, failure to do this will mean any spent cartridges you fire from your guns, will not despawn and will clog up your server memory before you know it.
Copy and Paste this in the World Item Removal Section:
Base.Brass22, Base.Brass57, Base.Brass380, Base.Brass9, Base.Brass38, Base.Brass357, Base.Brass45, Base.Brass45LC, Base.Brass44, Base.Brass4570, Base.Brass50MAG, Base.Brass223, Base.Brass556, Base.Brass545x39, Base.Brass762x39, Base.Brass308, Base.Brass762x51, Base.Brass762x54r, Base.Brass3006, Base.Brass50BMG, Base.Hull410g, Base.Hull20g, Base.Hull12g, Base.Hull10g, Base.Hull4g
** NO COMMA AFTER LAST ENTRY **


Step Six
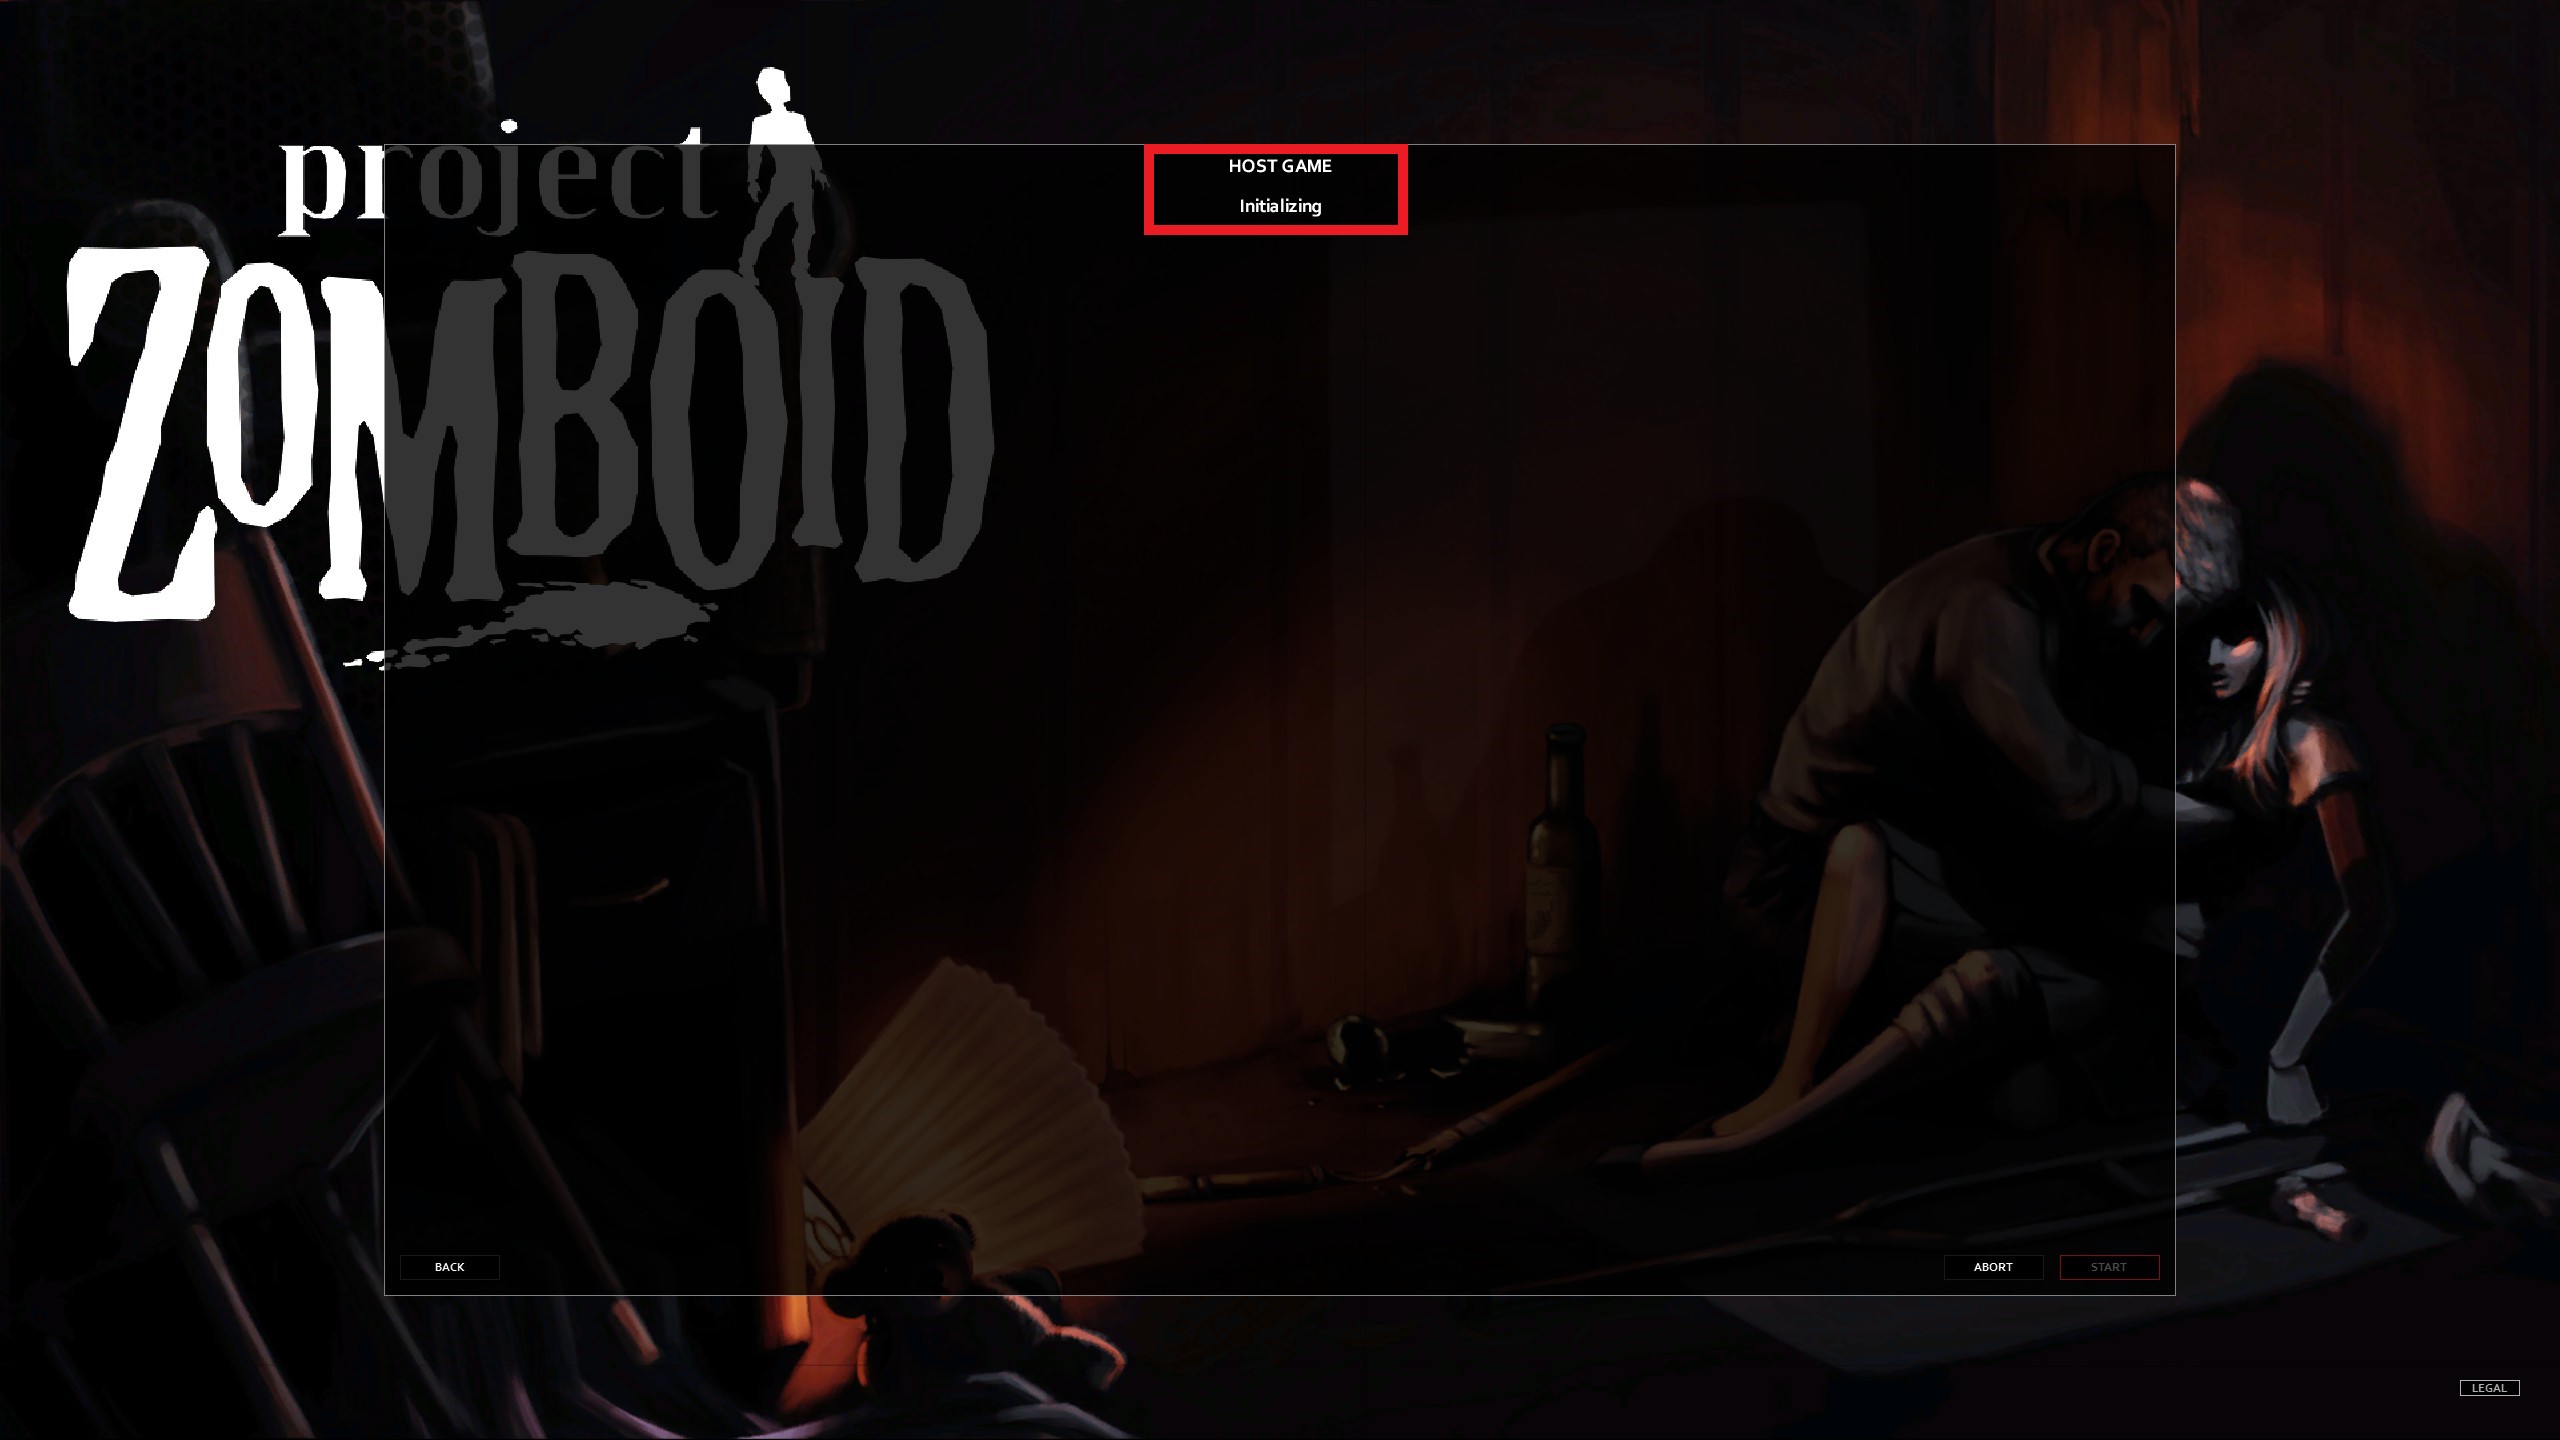
Now we are good to go, this is all you need to do, you can now follow my original guide and your server will load with the mods. If you ‘Click’ start. You will then see Initializing, Don’t panic if this screen hangs for a while, The server is downloading the mod/s, depending on your Download speed, this could take 1min or 10min, don’t abort, just be patient and wait for the ‘creating backup’ that’s when we know we have successfully added our mods and server is loading.
