Everything you need to know to get started with Hoiks. From their origin, to their mechanics, to their basic uses.
Terraria Hoiks Guide
Here you’ll find information on all of the basics on Hoiks, including:
- A brief rundown of the discovery of Hoiks.
- The game mechanics that created them.
- The setups that make them useful.
- Some general practical applications you can make in your own Terraria Worlds.
This guide intends to provide an easier to digest form of reading compared to the ancient forum posts and slow videos from the early 2010’s on this intricate Terraria mechanic. I prioritised lots of demonstrations on how to make Hoiks so hopefully the learning will be easier.
What is a Hoik?
Hoiks were found in the 1.2 update when sloped tiles were added; simply, a Hoik is a sawtooth series of sloped blocks. When an entity shares space with these sloped blocks, the entity is immediately displaced by a specific number of tiles in a predictable direction. This makes Hoiks a reliable form of travel for players, NPCs (both town NPCs and enemies), and items. Gradually, more mechanics behind Hoiks were discovered, mainly by ZeroGravitas, such as downwards movement, which wasn’t known of when horizontal and upwards movements were first found. Hoiks are no longer considered a glitch / exploit after Re-Logic announced hoiks as an official feature in the 1.3 update.
Why use Hoiks?
Hoiks allow entities to travel at a speed of 60 or 120 tiles per second, and entities can travel up to 180 tiles per second vertically, this means that Hoiks are one of the fastest methods of movement in the game. Along with high travel speeds, Hoiks allow automation of dropped item movement,
A 60 Tile Per Second Hoik

A 120 Tile Per Second Hoik

Sloped Tile Behaviour
Before you read through this section, you will notice that sloped tiles, although having predictable behaviour, are completely arbitrary in how they function. This makes memorising which type of sloped tile to use in your Hoiks a pain to learn. If you really struggle to understand this part, the easiest way to learn this is simply through experimentation.
Now that we have a basic understanding of what a Hoik is and why you would want to create some for yourself, we need to learn how sloped tiles behave in Terraria, as this knowledge will help us build Hoiks much more easily.
There are 16 types of Hoiks in Terraria, we’ll label these A through P. Not all Hoiks are made equally, some are very useful, while the rest have niche uses. I have marked the most important Hoik types with stars, and there is a table after this section with only the most important Hoik types.
Understand that these types assume the entity is standing perfectly in the centre of the two blocks when starting the Hoik, as positioning is a major factor as to whether a Hoik functions or not, meaning dysfunctional Hoiks may work properly if the entity was standing to the side of the platform. Their functionality for item Hoiking is not taken into consideration in their description.
Additionally, all of the Hoiks shown below will move the entity right, although types H and J say ‘No effect’ it is important to understand that (in most cases) Hoiks can be made using slopes that face the left.
Terraria Hoik Types
Hoik Type A:
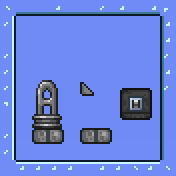
Incomplete displacement.
Hoik Type B:
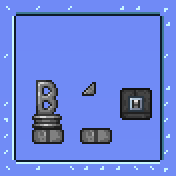
Provides a vertical displacement of 3 tiles.
Hoik Type C:
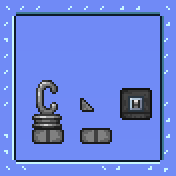
Incomplete displacement.
Hoik Type D:
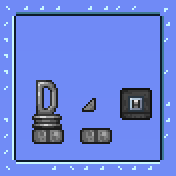
Provides a vertical displacement of 2 tiles.
Hoik Type E:
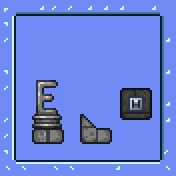
Incomplete displacement.
Hoik Type F:
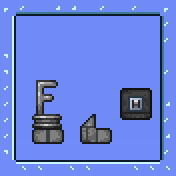
This Hoik is a ‘single tile rise Hoik’, meaning you cannot string this Hoik type into further Hoiks.
Hoik Type G:
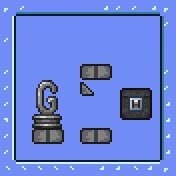
Provides a horizontal displacement of 2 tiles.
Hoik Type H:
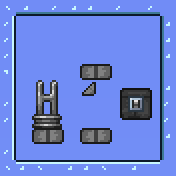
Jams.
Hoik Type I:
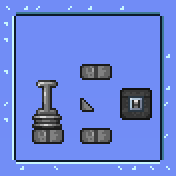
Provides a horizontal displacement of 1 tile.
Hoik Type J:
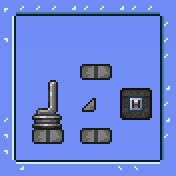
Jams
Hoik Type K:
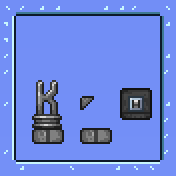
Provides a horizontal displacement of 1 tile.
Hoik Type L:
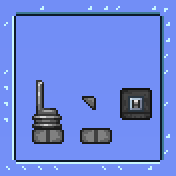
No effect.
Hoik Type M:
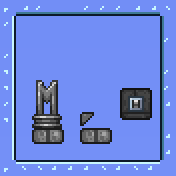
This Hoik is a ‘single tile rise Hoik’, meaning you cannot string this Hoik type into further Hoiks.
Hoik Type N:
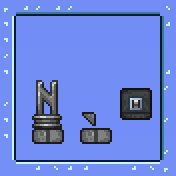
This Hoik is a ‘single tile rise Hoik’, meaning you cannot string this Hoik type into further Hoiks.
Hoik Type O:
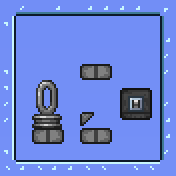
Provides a horizontal displacement of 2 tiles.
Hoik Type P:
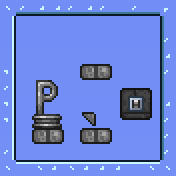
No effect.
Important Hoik Types
| Type | Photo | Functionality |
| Hoik Type B |  | Provides a vertical displacement of 3 tiles. |
| Hoik Type D |  | Provides a vertical displacement of 2 tiles. |
| Hoik Type G |  | Provides a horizontal displacement of 2 tiles. |
| Hoik Type I |  | Provides a horizontal displacement of 1 tile. |
| Hoik Type K |  | Provides a horizontal displacement of 1 tile. |
| Hoik Type O |  | Provides a horizontal displacement of 2 tiles. |
Building Your First Hoik
With the information we have on sloped tile behaviour, we can already make an array of Hoiks, such as moving NPCs around, or murdering town NPCs if you want to farm for a rare drop.
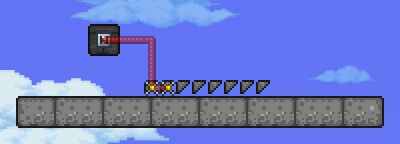
Here is a super simple setup which would allow the player to move right at 60 tiles per second.

What about 120 tiles per second?

It’s important to note that when you are using a horizontal Hoik that doesn’t have a ceiling, you need to hold the DOWN key otherwise your Hoik won’t work.
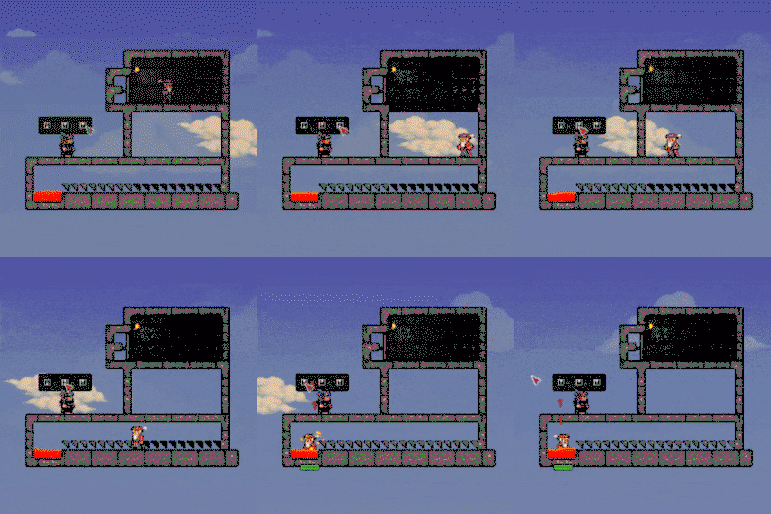
Evicting the merchant.
Remember about ceilings when Hoiking NPC’s, your Hoik won’t work if there is no ceiling
We can bully hostile enemies as well using Hoiks, like these Undead Vikings.
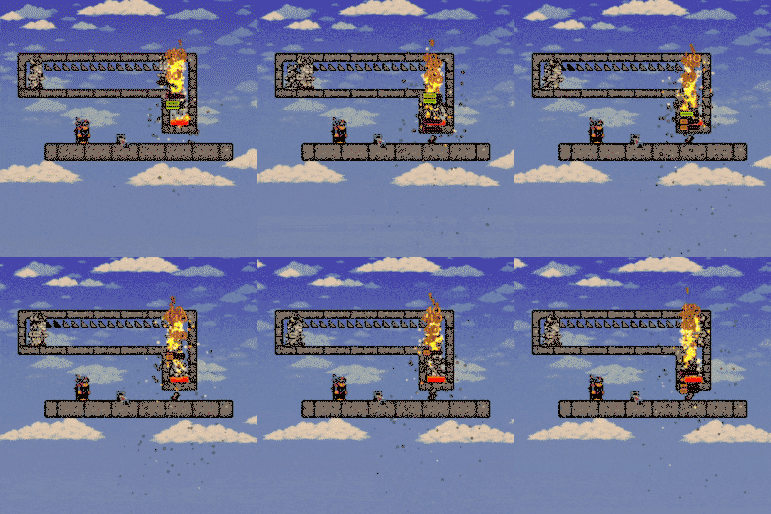
Just know that when you’re trying to Hoik a hostile enemy, you need to be positioned below them, otherwise they won’t Hoik, this is similar to how you have to hold down when horizontally Hoiking.
Vertical Hoiking
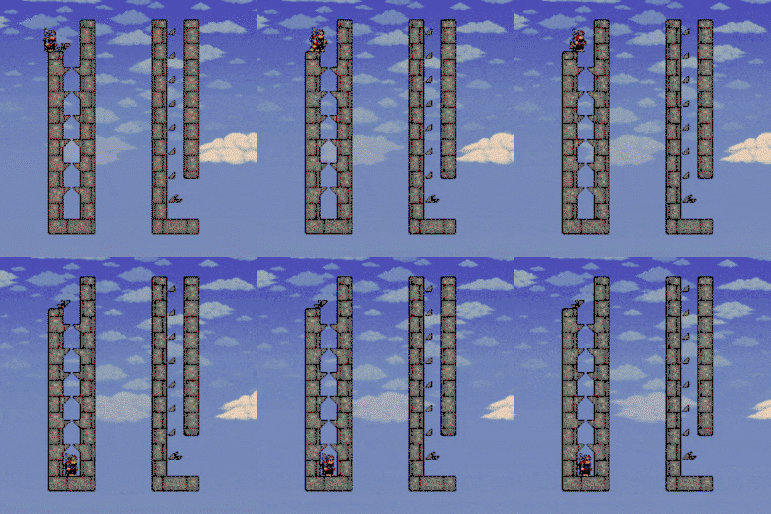
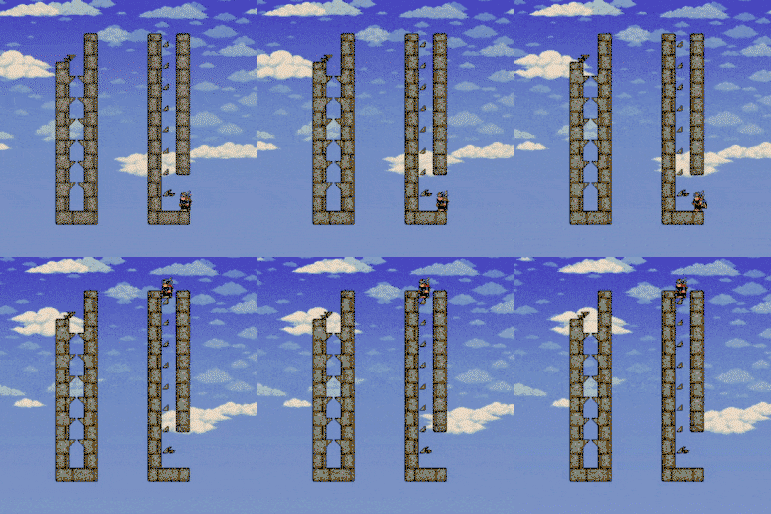
We’ve learnt how to travel left and right, now let’s learn how to travel up and down.
Using this alignment of Hoik teeth, we can travel upwards or downwards, this is easiest done with the mounting method of placing a sloped platform (staircase) against the first tooth in your Hoik. If we hold DOWN, this staircase allows us to walk into the adjacent block, kickstarting our hoik. (You don’t need to hold down on the upwards Hoik as you can’t start walking up the stairs)
There are many different ways of Hoiking up and down, these are just 2 methods.
Mounting Your Hoiks
Mounting a Hoik simply means getting stuck in the first block of your Hoik chain.
There are lots of different techniques that we can use to mount our Hoiks, but the most straightforward and fundamental are the following:
- Actuating the first block (or ‘tooth’) in your Hoik, walking in front of it, and reactivating the block
- Placing a teleporter directly underneath your hoik to instantly start your Hoik after teleporting.
- Using a staircase platform to enter your Hoik like in the previous section.

From Here on, Hoiking and Gamerules Get More Complicated.
Dropped Item Sizes
Before we start to plan our designs for our item Hoiks, we need to learn about ‘Dropped Item Sizes’, this is not the resolution of the pixels in an items pixelart, but USUALLY how tall a dropped item is.
Most items fall under three different sizes, these being 1 tile tall, 2 tiles tall, and 3 tiles tall; we’ll call these T1 items, T2 items, and T3 items from now on for simplicity.
Here is an example of some T1, T2, and T3 items.
From left to right we have: stone slabs (T1), martian conduit plates (T1), gel (T1), harpy feathers (T1), an architect gizmo pack (T2), a flairon (T1), and a night’s edge (T3).
Notice how the harpy feather is taller than the gel, but it’s still a T1 item, and the flairon is the same size as the architect gizmo pack, but they’re different T’s; it’s important to test the height of the item with a Hoik before you make an automated collector.

Hoiking T1 Items
T1 items are the most complicated items to Hoik.
Before we start Hoiking T1 items, just know it is IMPOSSIBLE to Hoik a T1 item left or down, they can only move up and right, luckily we can just use gravity to move T1 items down.
To move a T1 item horizontally, we need a setup like this:
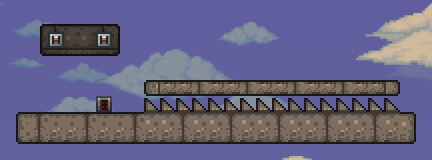
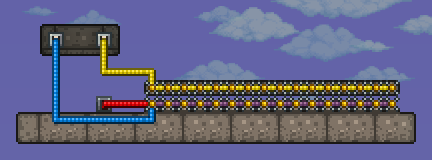
Remember, we will need a ceiling for our Hoik otherwise the item will be displaced vertically instead of horizontally.
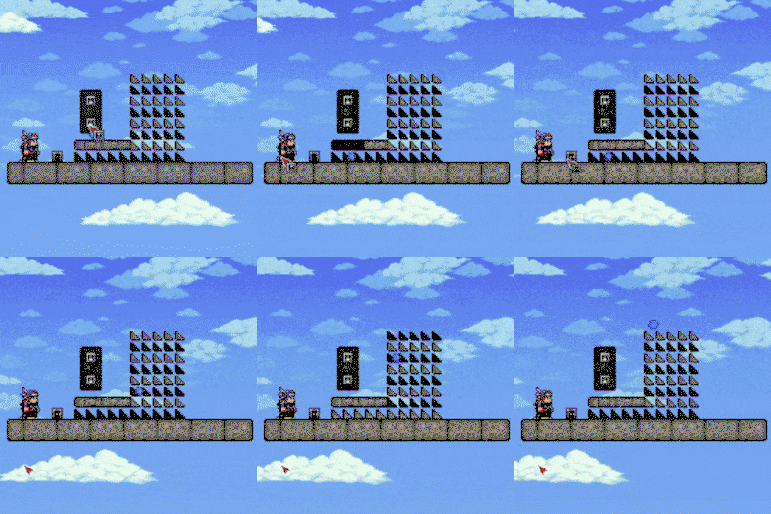
Notice how we’re using timers in addition to levers, this is because T1 items will jam after travelling a random distance in a horizontal Hoik, we’ll be using timers for all of our T1 Hoiks from now on.
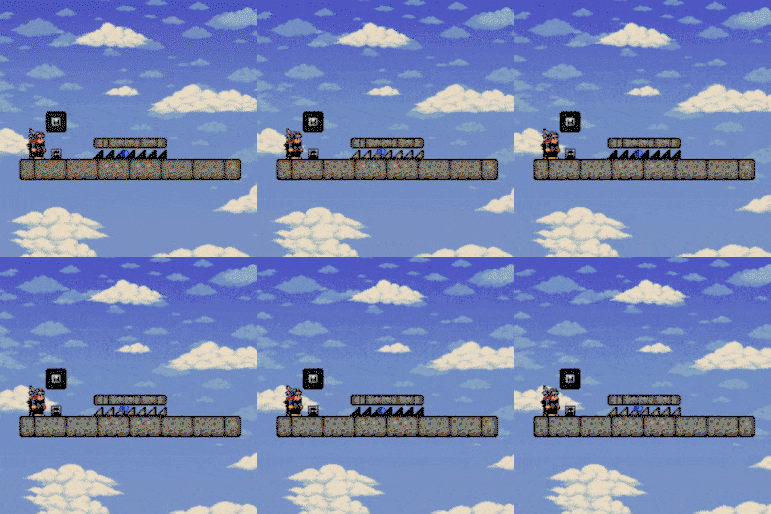
Attempting (and failing) to Hoik a T1 item to the left.
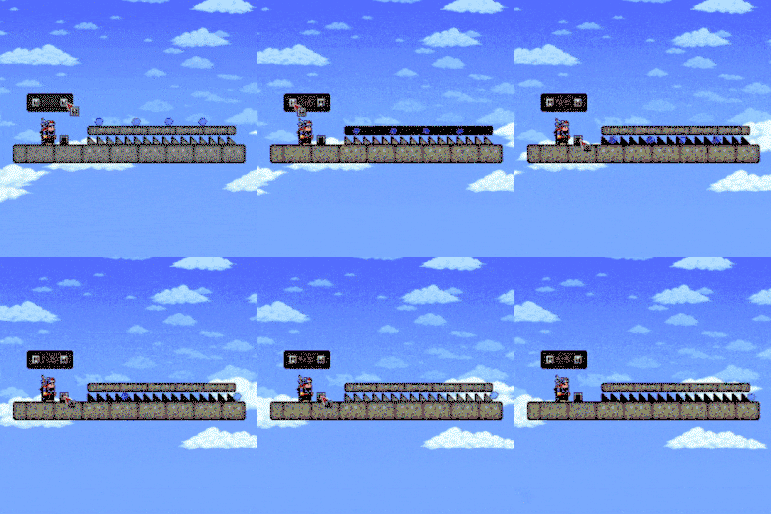
Remember, with T1 items, you need to be using the upwards sloped tiles, T1 items will jam and cannot unjam if you use downwards sloped tiles.
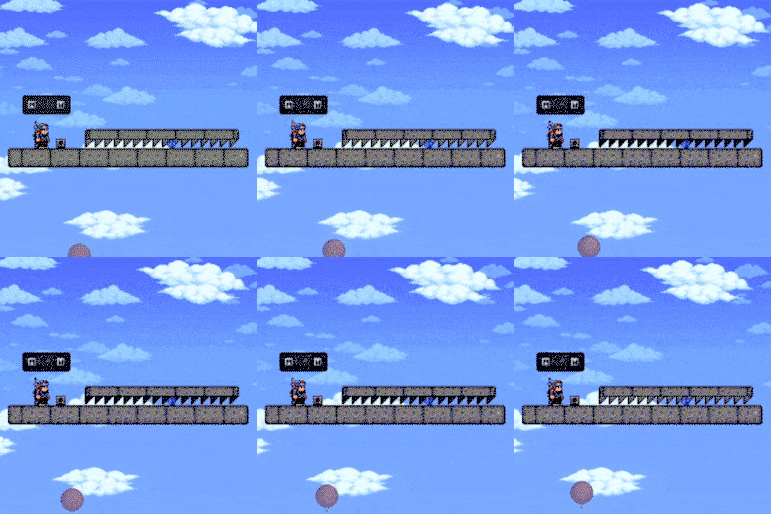
A failed T1 item Hoik, the incorrect type of sloped tile is used.
Vertically Hoiking T1 Items
Great, now we understand how to horizontally Hoik T1 items to the right, let’s learn how to vertically Hoik T1 items. (Don’t worry, it’s very similar to horizontal Hoiking.)
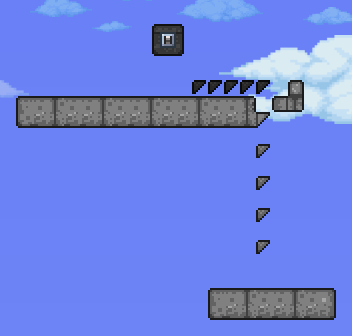
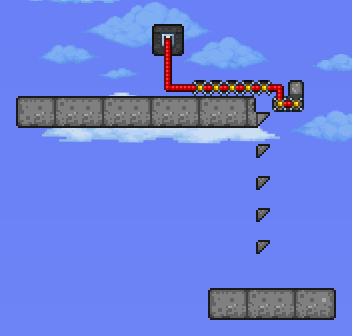
Here is a vertical Hoik for T1 items, which also demonstrates how it would link to a horizontal Hoik.
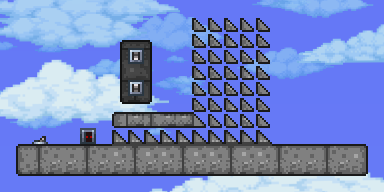
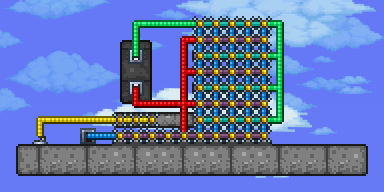
The wiring looks messy, but it’s very simple:
- The two wall mounted levers are to actuate every other Hoik tooth.
- The timer actuates all of the Hoik teeth.
- The lever on the far left actuates the ceiling.
As T1 items are only 1 tile tall, they need to be displaced into a tile adjacent to them, meaning all of our T1 item hoiks need to be completely filled with teeth to function.
Hoiking T2 Items
T2 items also have quirks with Hoiking, but they’re much better than T1 items.
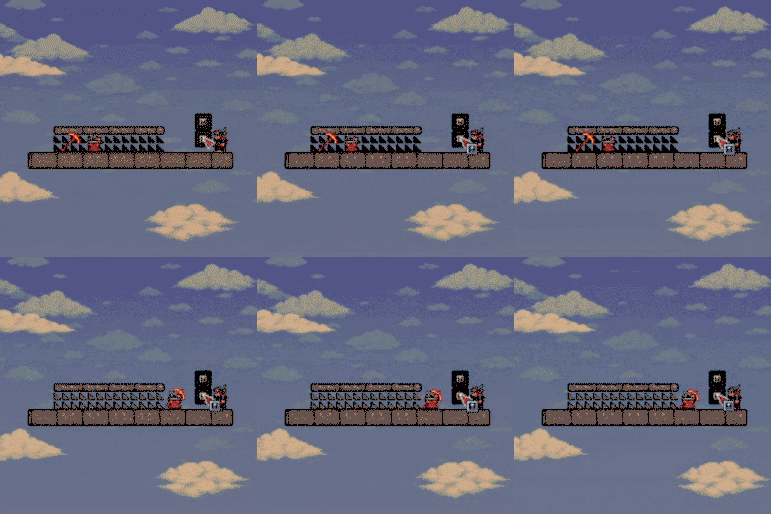
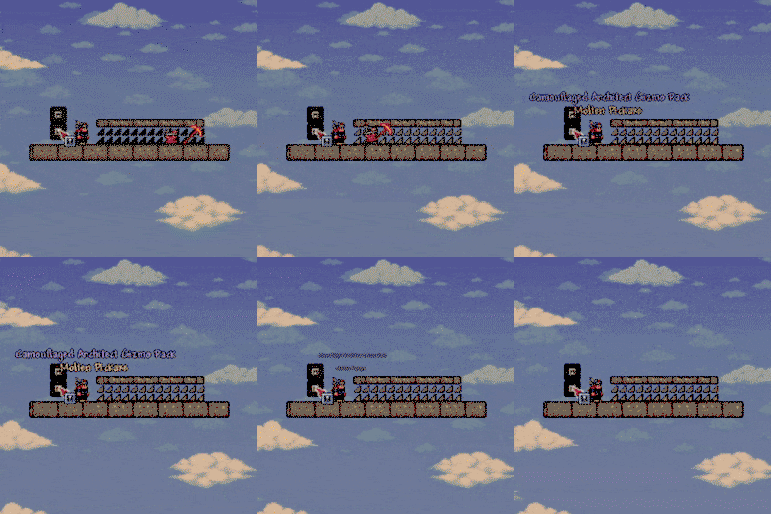
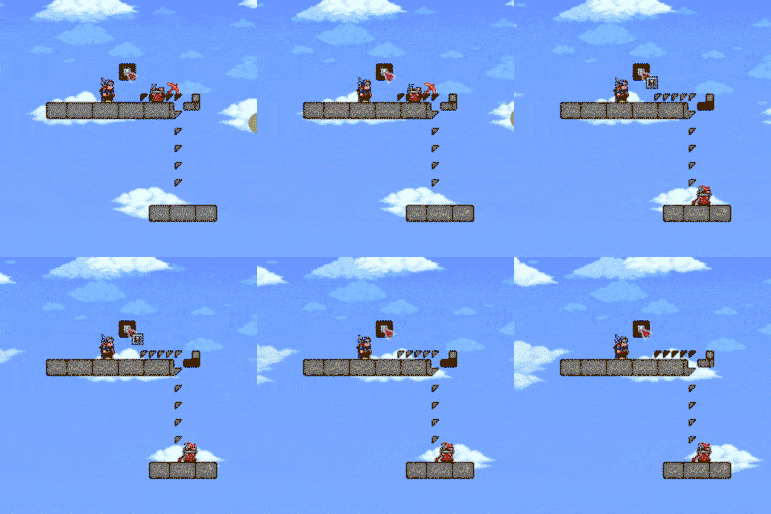
We’ll start with horizontal Hoiking.
T2 items can Hoik to both the right and the left.
T2 items can Hoik upwards, and do not require a timer.
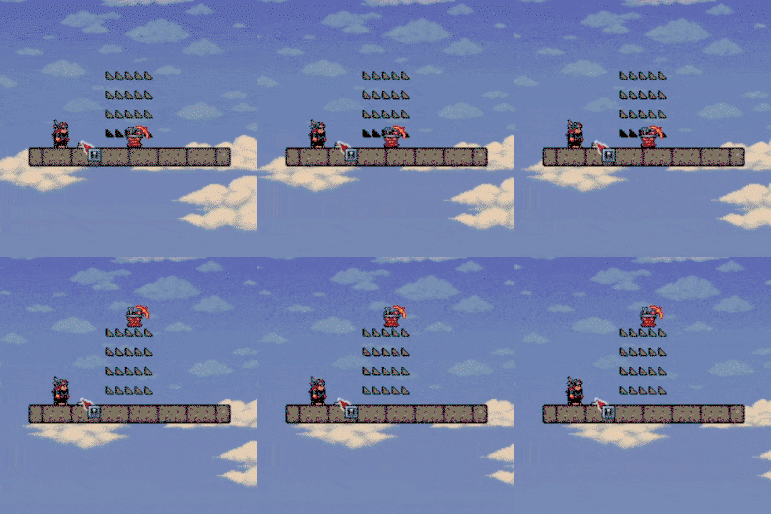
T2 items can Hoik downwards. However, they need to have a running horizontal start, a stationary T2 item will not Hoik downwards.
Hoiking T3 Items
T3 items are the simplest items to Hoik, they are the same height as the player, so they (mostly) act the same way.
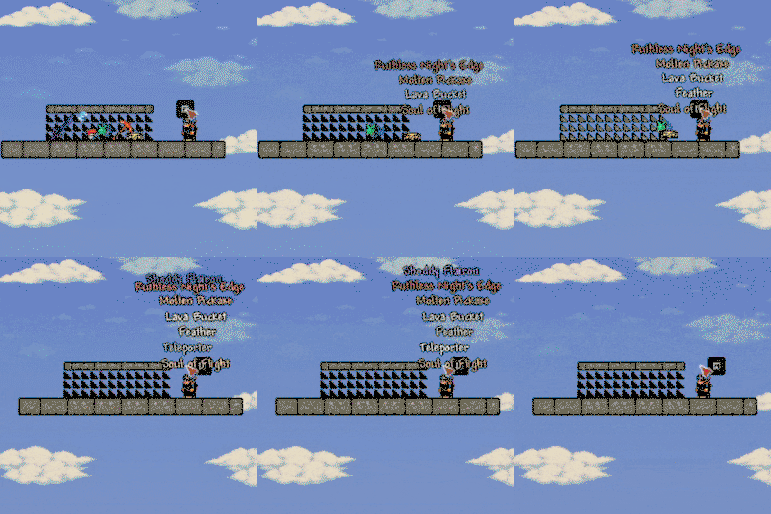
Let’s start with horizontal Hoiks.
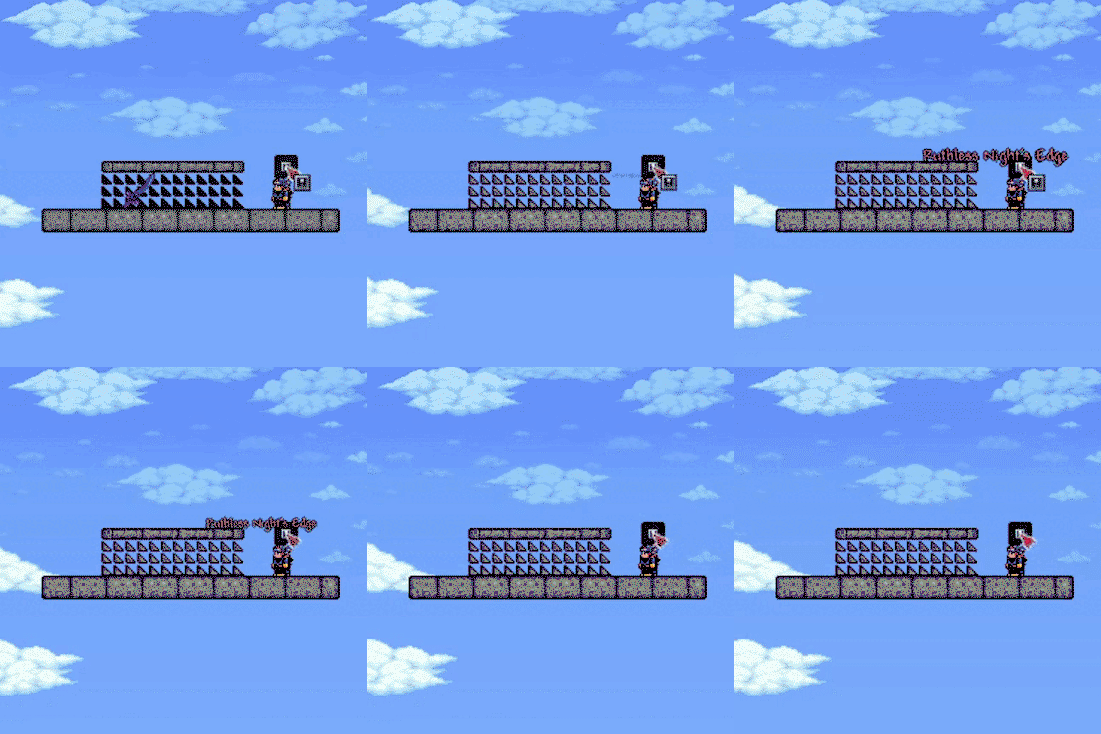
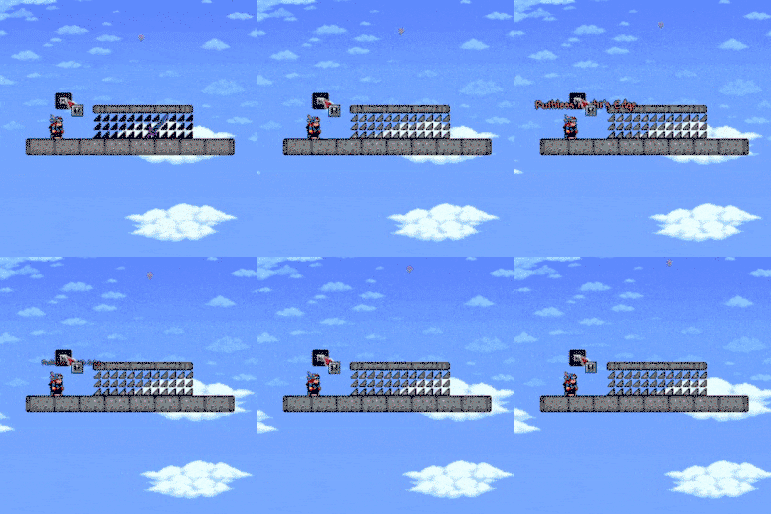
The nice thing about T3 horizontal Hoiks is that they can Hoik T1 and T2 items aswell (Only to the right for T1 items of course).
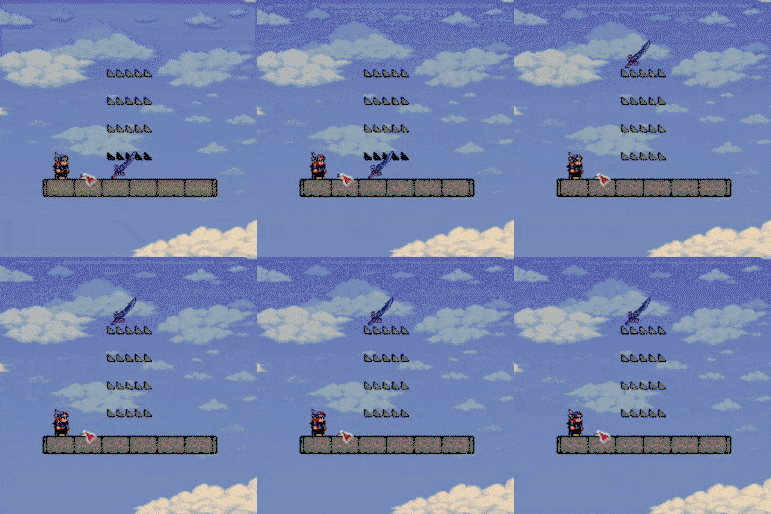
Now let’s do an upwards Hoik
And now finally a downwards Hoik.
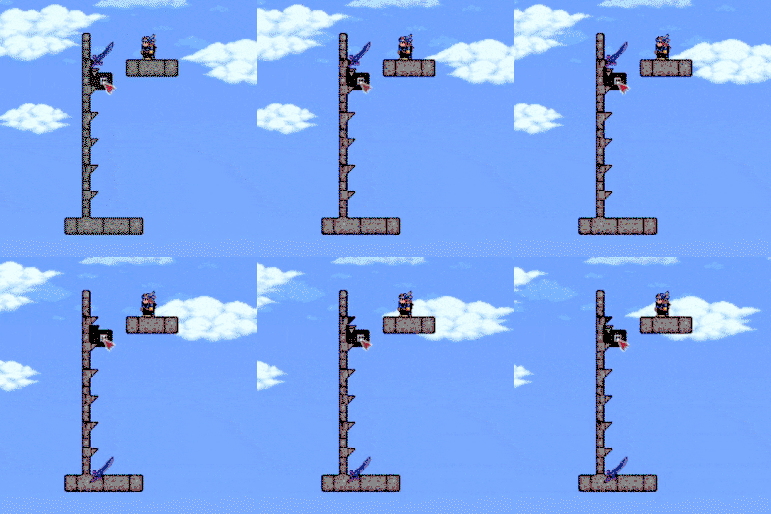
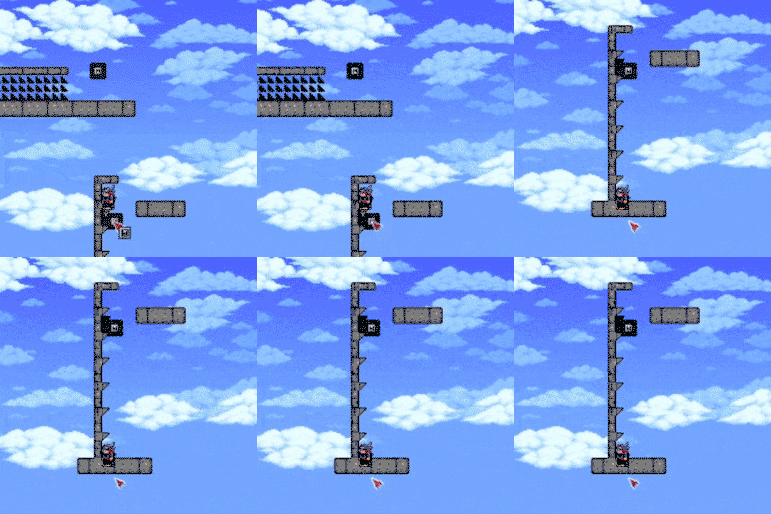
This item Hoik also doubles up as a player Hoik if you create a ceiling while standing ontop of the platform.
Bonus Information
To finish this guide, here are some small, but still useful quality of life features Hoiks can bring to your Terraria worlds.
Doors for Mounts:
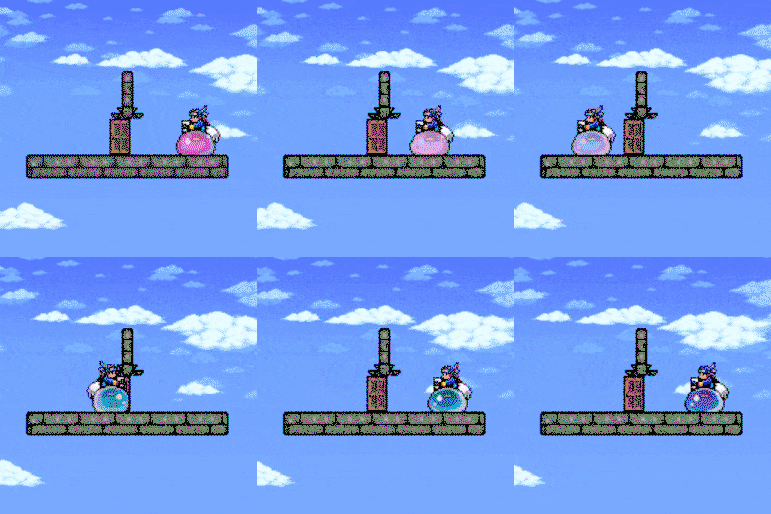
By adding a sloped platform to the block above an open door, your 4 tile tall mounts can Hoik through your doors.
One Way Walls:
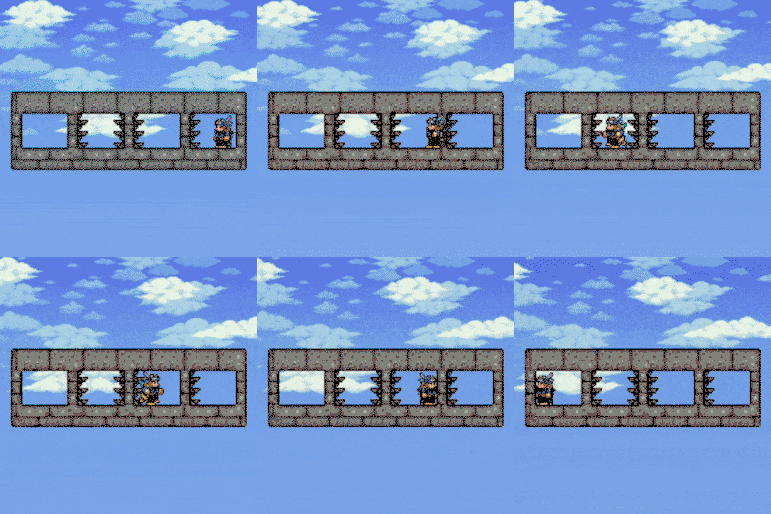
Adding sloped platforms to the side of a wall and holding down while walking lets you walk through it.
Note from Creator by unpronounceable: This guide covered content, mechanics, and game rules I never knew existed during my 2000~ hours playtime since I started playing Terraria in 2013. This guide has been an experience to create, and took many, many hours of researching, learning, testing, writing, and polishing to complete (and it’s only the basics.). Almost all of the content covered in this guide was discovered by ZeroGravitas, an oldschool Terraria Youtuber who, although they are still active on Youtube today, hasn’t uploaded a Terraria video since 2016.
We would like to thank the above-mentioned and those who contributed to the creation of this guide. You can also find the owner of the guide here: Unpronouceable